In the module MANAGEMENT / CYLINDERS you have access to the cylinders of the current locking system. Here you can create new cylinders, edit the data of existing cylinders, delete cylinders and more.
Please note: The more carefully you work here, the more reporting options you will have later.
Attention: Only possible when "Locking system" is active, not "Building".
In the module MANAGEMENT / CYLINDERS click the toolbar button ADD RECORD.
The window CYLINDER opens.
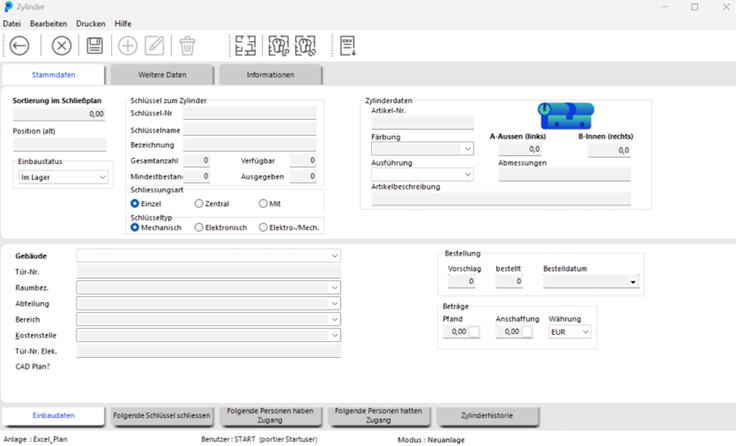
Now you can enter the data for the new cylinder.
The sort order comes from the manufacturer and corresponds to the former row in the locking plan. New sort orders are purely numeric, for example 1.00 or 2.00. Because two decimal places are used, up to 99 further positions can be inserted between any two existing entries later.
Note: The key number is sometimes also called the locking number or the lock and key number.
The total number shows how many individual keys were delivered with this cylinder. portier®VISION adds up all keys with the same key number in the key management and always shows that sum.
The cylinder data in the right section describes the technical cylinder and is always supplied by the manufacturer. Some manufacturers, KABA for example, use a single field for type, length and colour. portier then shows that data in the Item description field.
The installation data is recorded in the lower part of the form.
The tabs at the very bottom are updated by portier itself during ongoing operation.
In the module MANAGEMENT / CYLINDERS display all recorded cylinders of the current locking system by clicking the button START SEARCH.
Since this list can become very long, you can also search for a particular cylinder. Enter the first characters of the key number in the field KEY NO.. Start the search by clicking the button START SEARCH. Alternatively, use the ENTER key. The matching cylinders are displayed. Select the desired cylinder by clicking it, then click the button EDIT.
Alternatively, you can double-click the cylinder. In both cases the window CYLINDER opens. Here click the button EDIT. Now you can edit the existing cylinder data.
portier VISION allows you to use building plans. You assign a building plan to the cylinder once and portier VISION finds that plan and installation location again every time.
Please note:
portier VISION accepts CAD plans in DXF, DWG, SVG, HPGL2 and CGM format. DXF and DWG are supported by every AutoCAD program. The article "CAD File Support in DWG/DXF Format" lists the supported versions.
In the module MANAGEMENT / CYLINDERS display the cylinder (see above) that should be connected to a CAD plan.
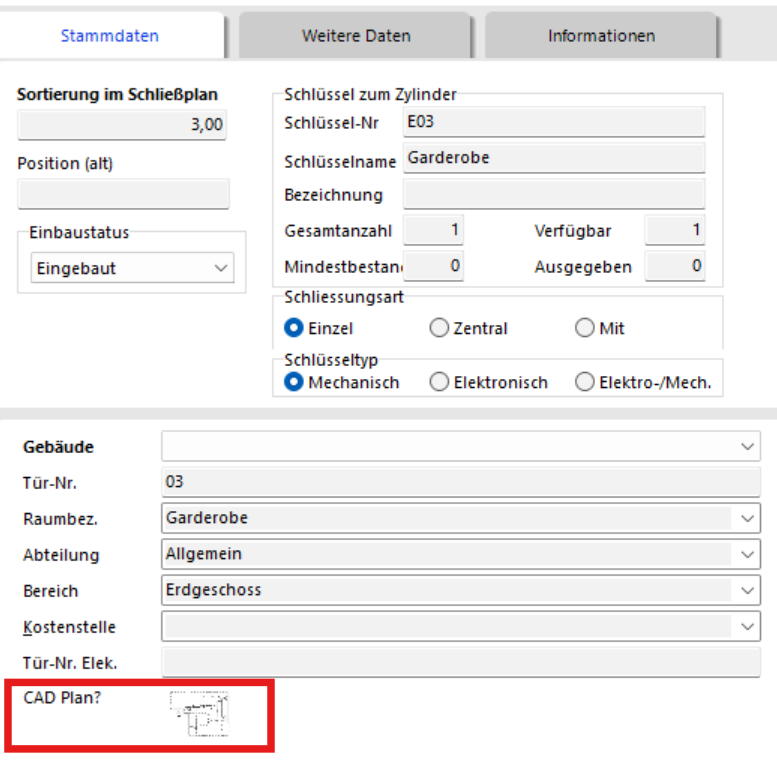
In this window you can see immediately whether the cylinder has already been assigned to a CAD plan. In that case a symbolic CAD plan is shown here.

To assign the current cylinder to a CAD plan, click the button LINK CYLINDER TO CAD PLAN.
Here, display the available CAD plans by clicking the button START SEARCH.
Select the desired CAD plan by clicking it and leave the window by clicking the button USE SEARCH RESULT.
The window CAD PLAN opens.
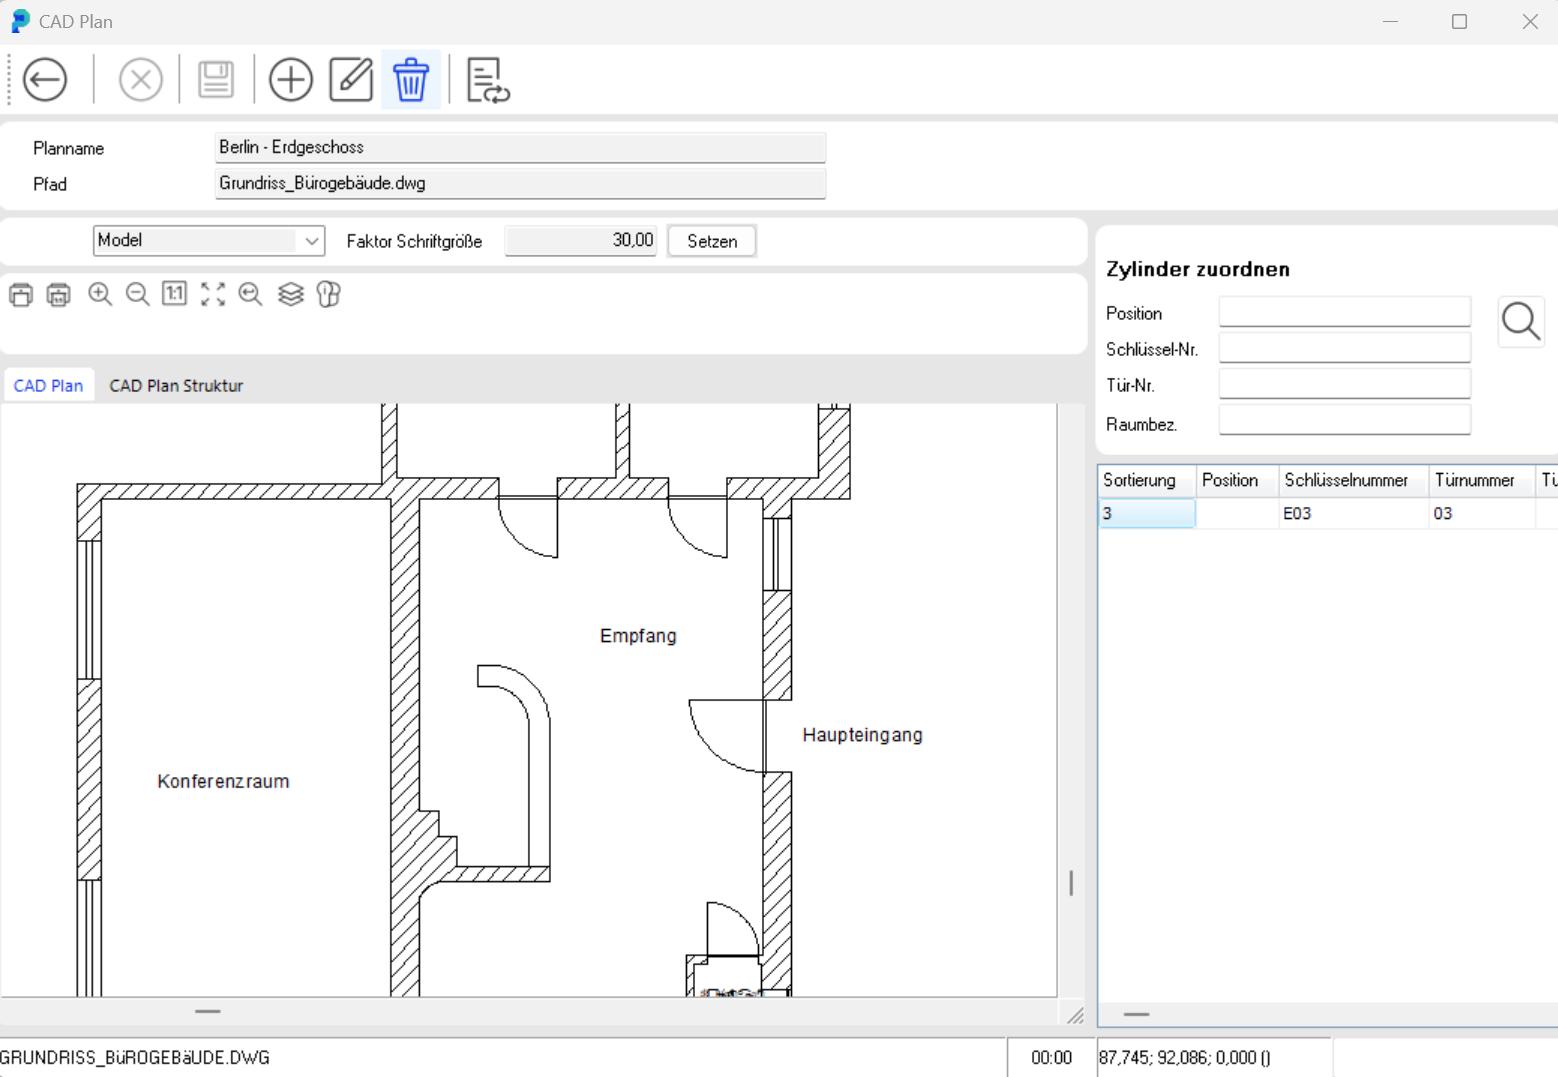
In the right part of the window CAD PLAN you can see the current cylinder.
To assign the cylinder to a room, drag it into the desired room while holding the left mouse button.
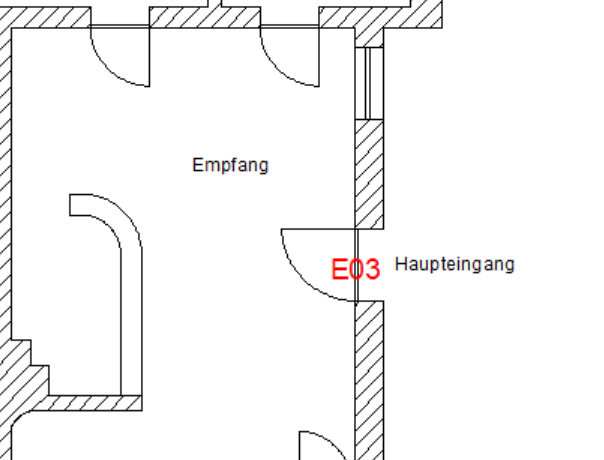
In the CAD plan, the key number of the cylinder is displayed in red:
Leave the window CAD PLAN by clicking the button BACK.

You are back in the window CYLINDER and can see from the CAD plan symbol that the current cylinder has been assigned to a CAD plan:
Leave the window CYLINDER by clicking the button BACK.

To detach the cylinder from the CAD plan, click the button DETACH CYLINDER FROM CAD PLAN in the window CYLINDER.

Confirm the prompt by clicking the button YES.
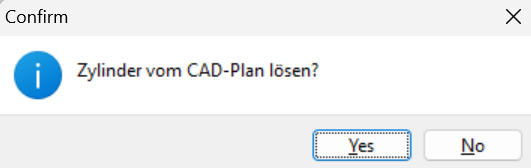
The CAD plan preview is then removed from the window CYLINDER.
Alternatively to the described procedure, you can click the red key number of the cylinder in the CAD plan with the left mouse button.
A window opens in the CAD plan with five options:
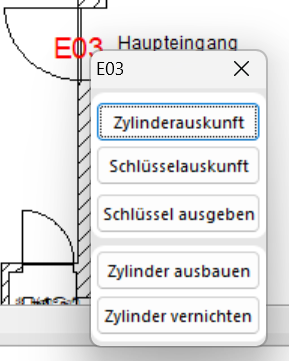
Jump to the Cylinder window of the current cylinder
Jump to the Key window of the current key
Jump to the Key Movement window
The current cylinder is removed
The current cylinder is destroyed
When you have selected a cylinder for editing (see above), you will find five tabs in the lower part of the window CYLINDER that show further information.

Where is the cylinder currently installed?
Please note: to make changes, the cylinder must be opened for editing by clicking the button EDIT.

Which keys lock this cylinder?
Central lockings and shared lockings are shown, as well as all group and function keys.

Who has access to this room (via the cylinder)?

Who previously had access to this room?
Where was the cylinder previously installed?