The personnel import brings personal data from a CSV file into portier Vision. It runs in portier Vision Companion, no longer in Vision itself. Vision starts Companion from the menu and signs you in with your Vision user.
Important. The live run reconciles departures. Anyone an earlier personnel CSV import created, and who is missing from your file, is marked departed. A truncated export therefore marks half your workforce as departed, without asking. Read "Departures, and how to undo them" before your first live run.
A CSV file with one row per person. Companion does not read Excel files, so export a CSV from Excel.
A column holding the personnel number. It is required. The import uses it to decide whether a record is created or updated.
No particular column order. Companion detects the encoding, delimiter, header row and date format itself.
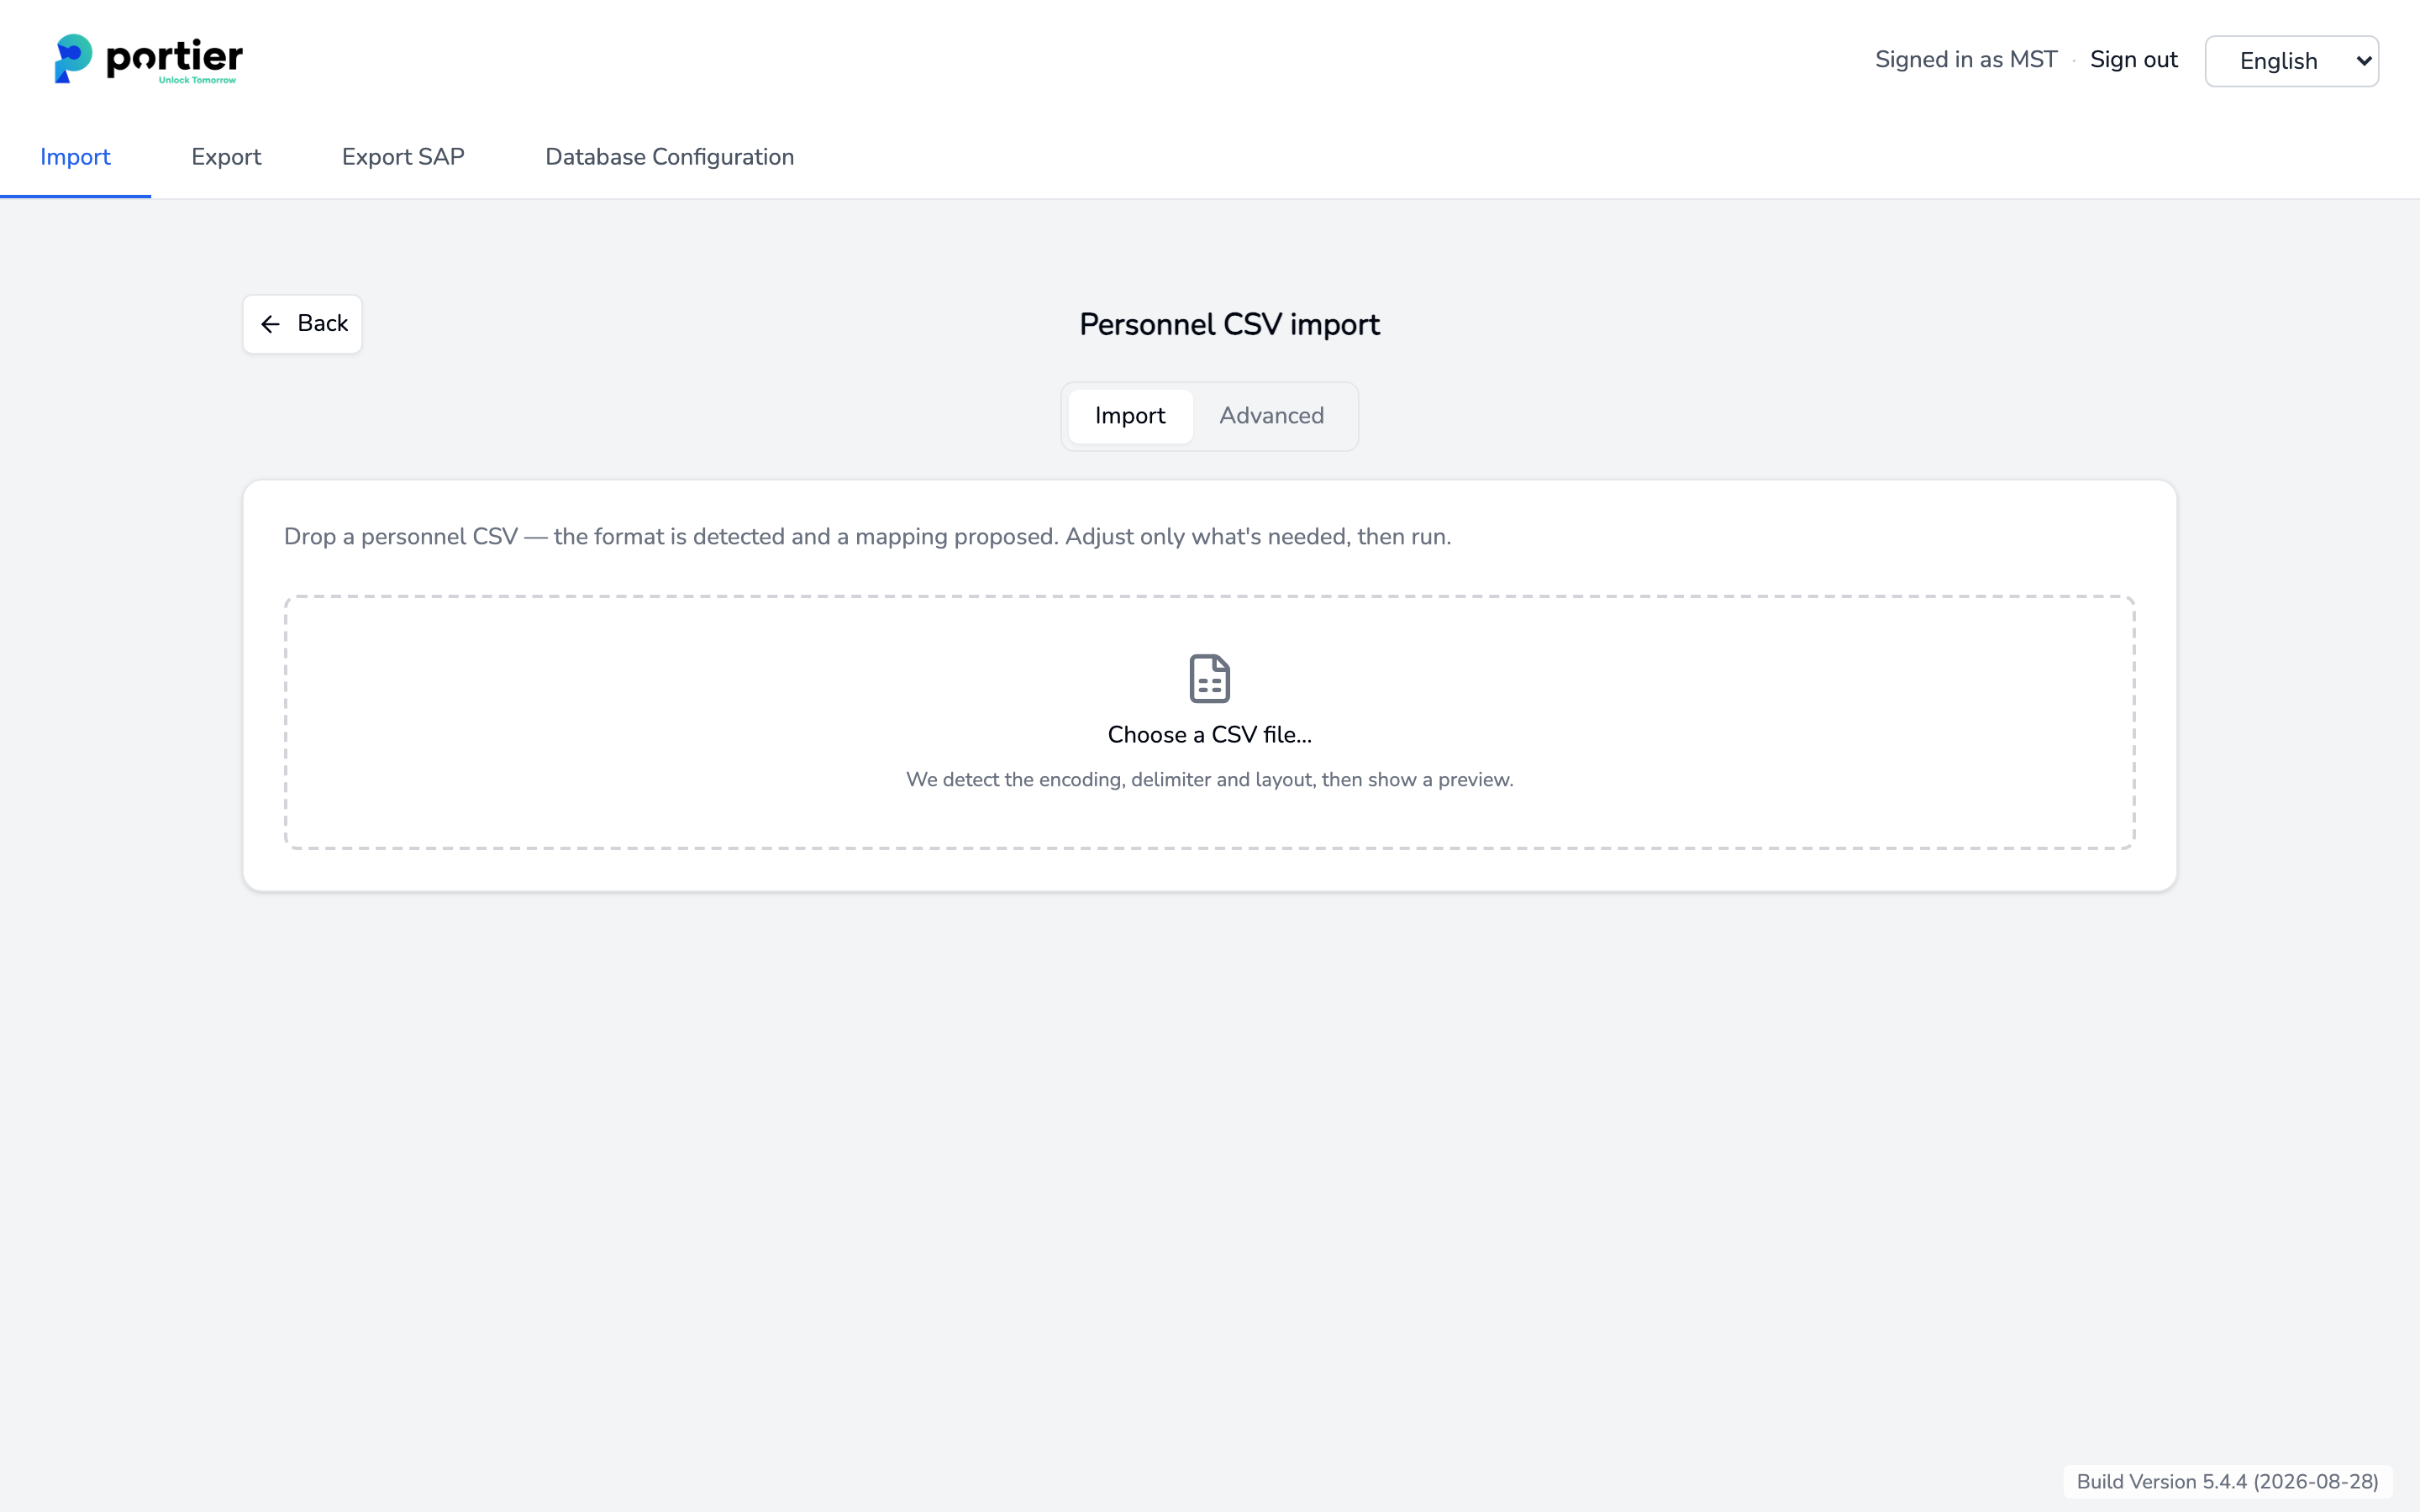
In Vision, open the System menu and select Import person data. portier Vision Companion starts.
Choose the Personnel CSV card and click Open personnel import. The Personnel CSV import screen has two tabs, Import and Advanced.
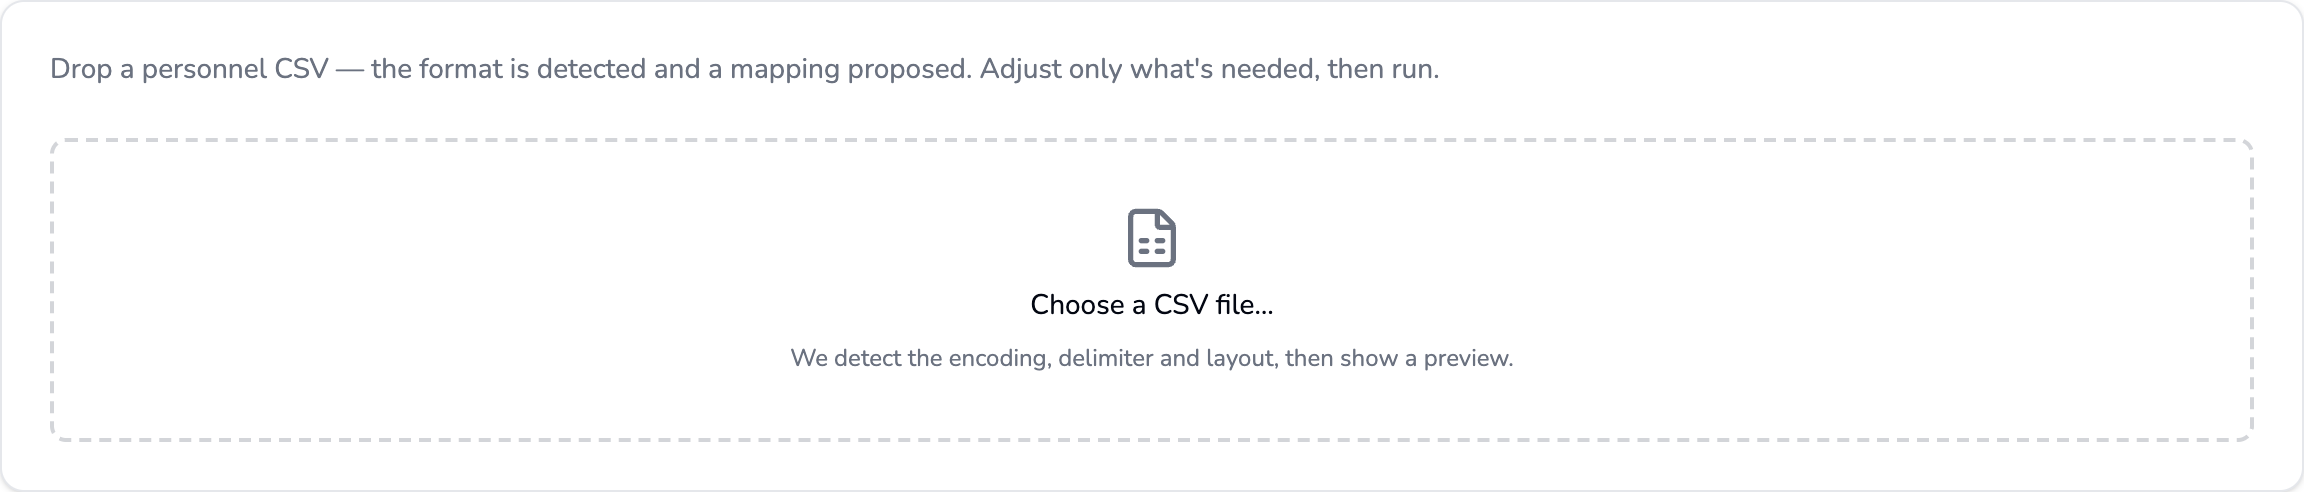
Click Choose a CSV file and pick your file. Detected file format shows what Companion found, along with First lines and Date columns.
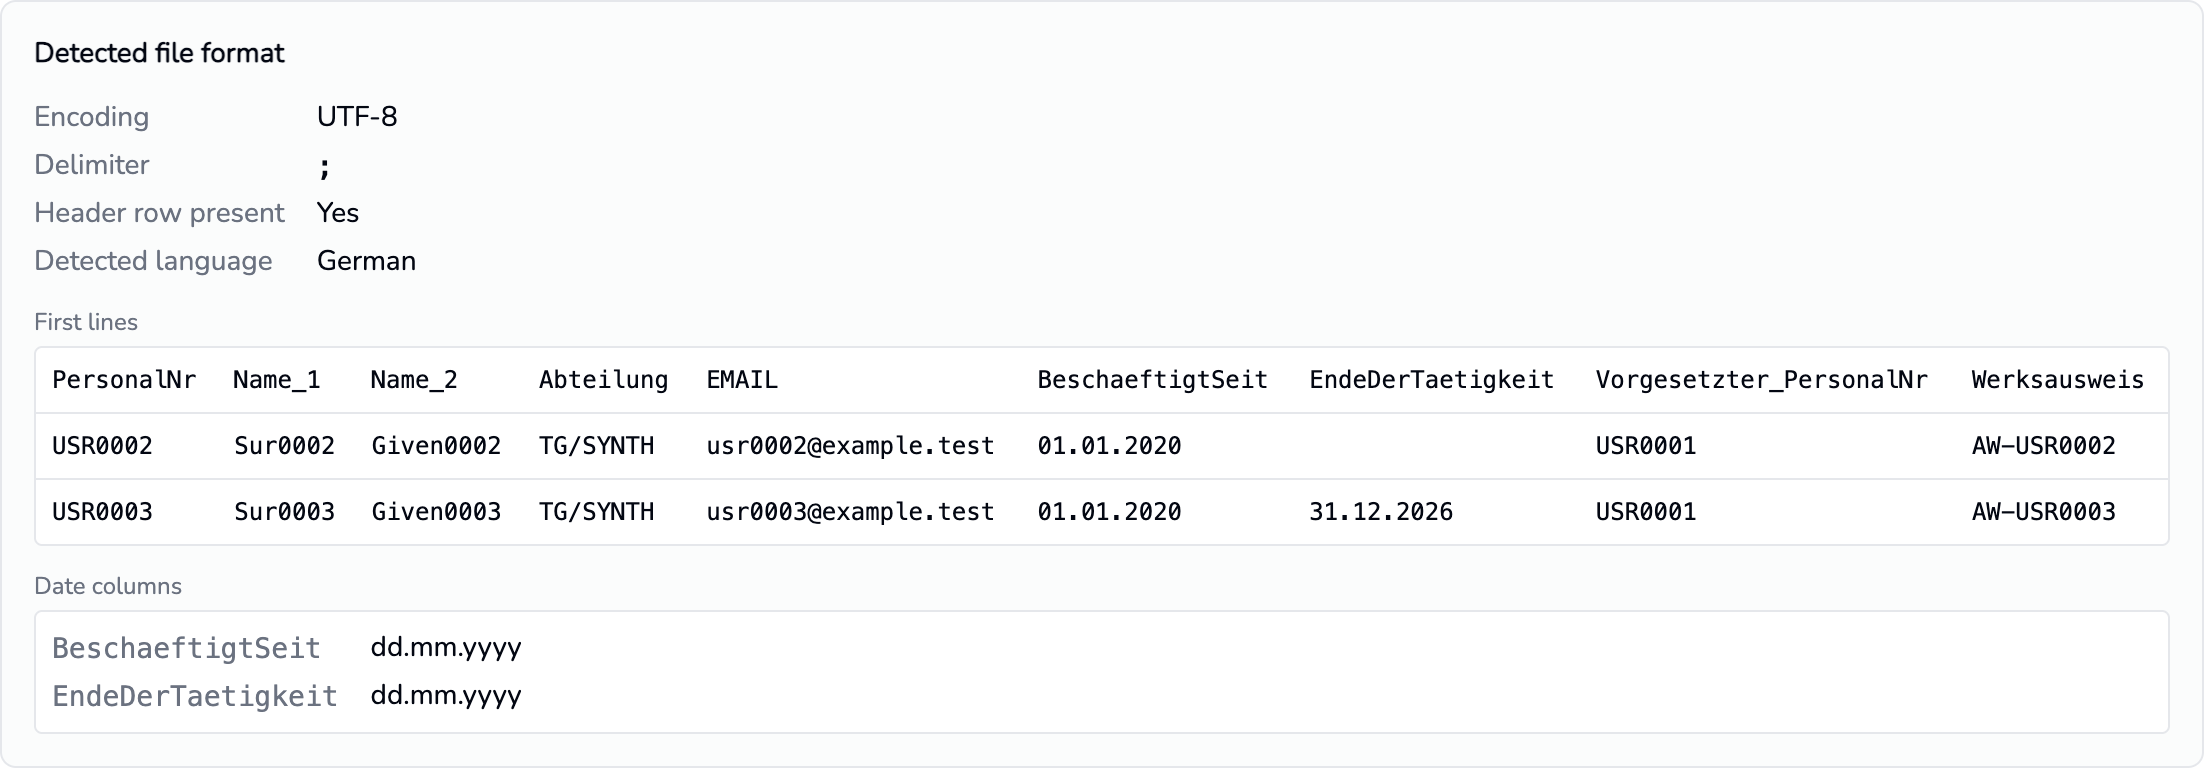
Check the preview below it. For each row it shows the raw cells, the mapping produced from them, and any errors.
Unrecognised columns lists the columns the mapping did not use. Map the ones you need with Map to field. The rest are ignored.

Check the Run options. Dry-run (no database writes) is on by default. The run works everything out but writes nothing to the database.

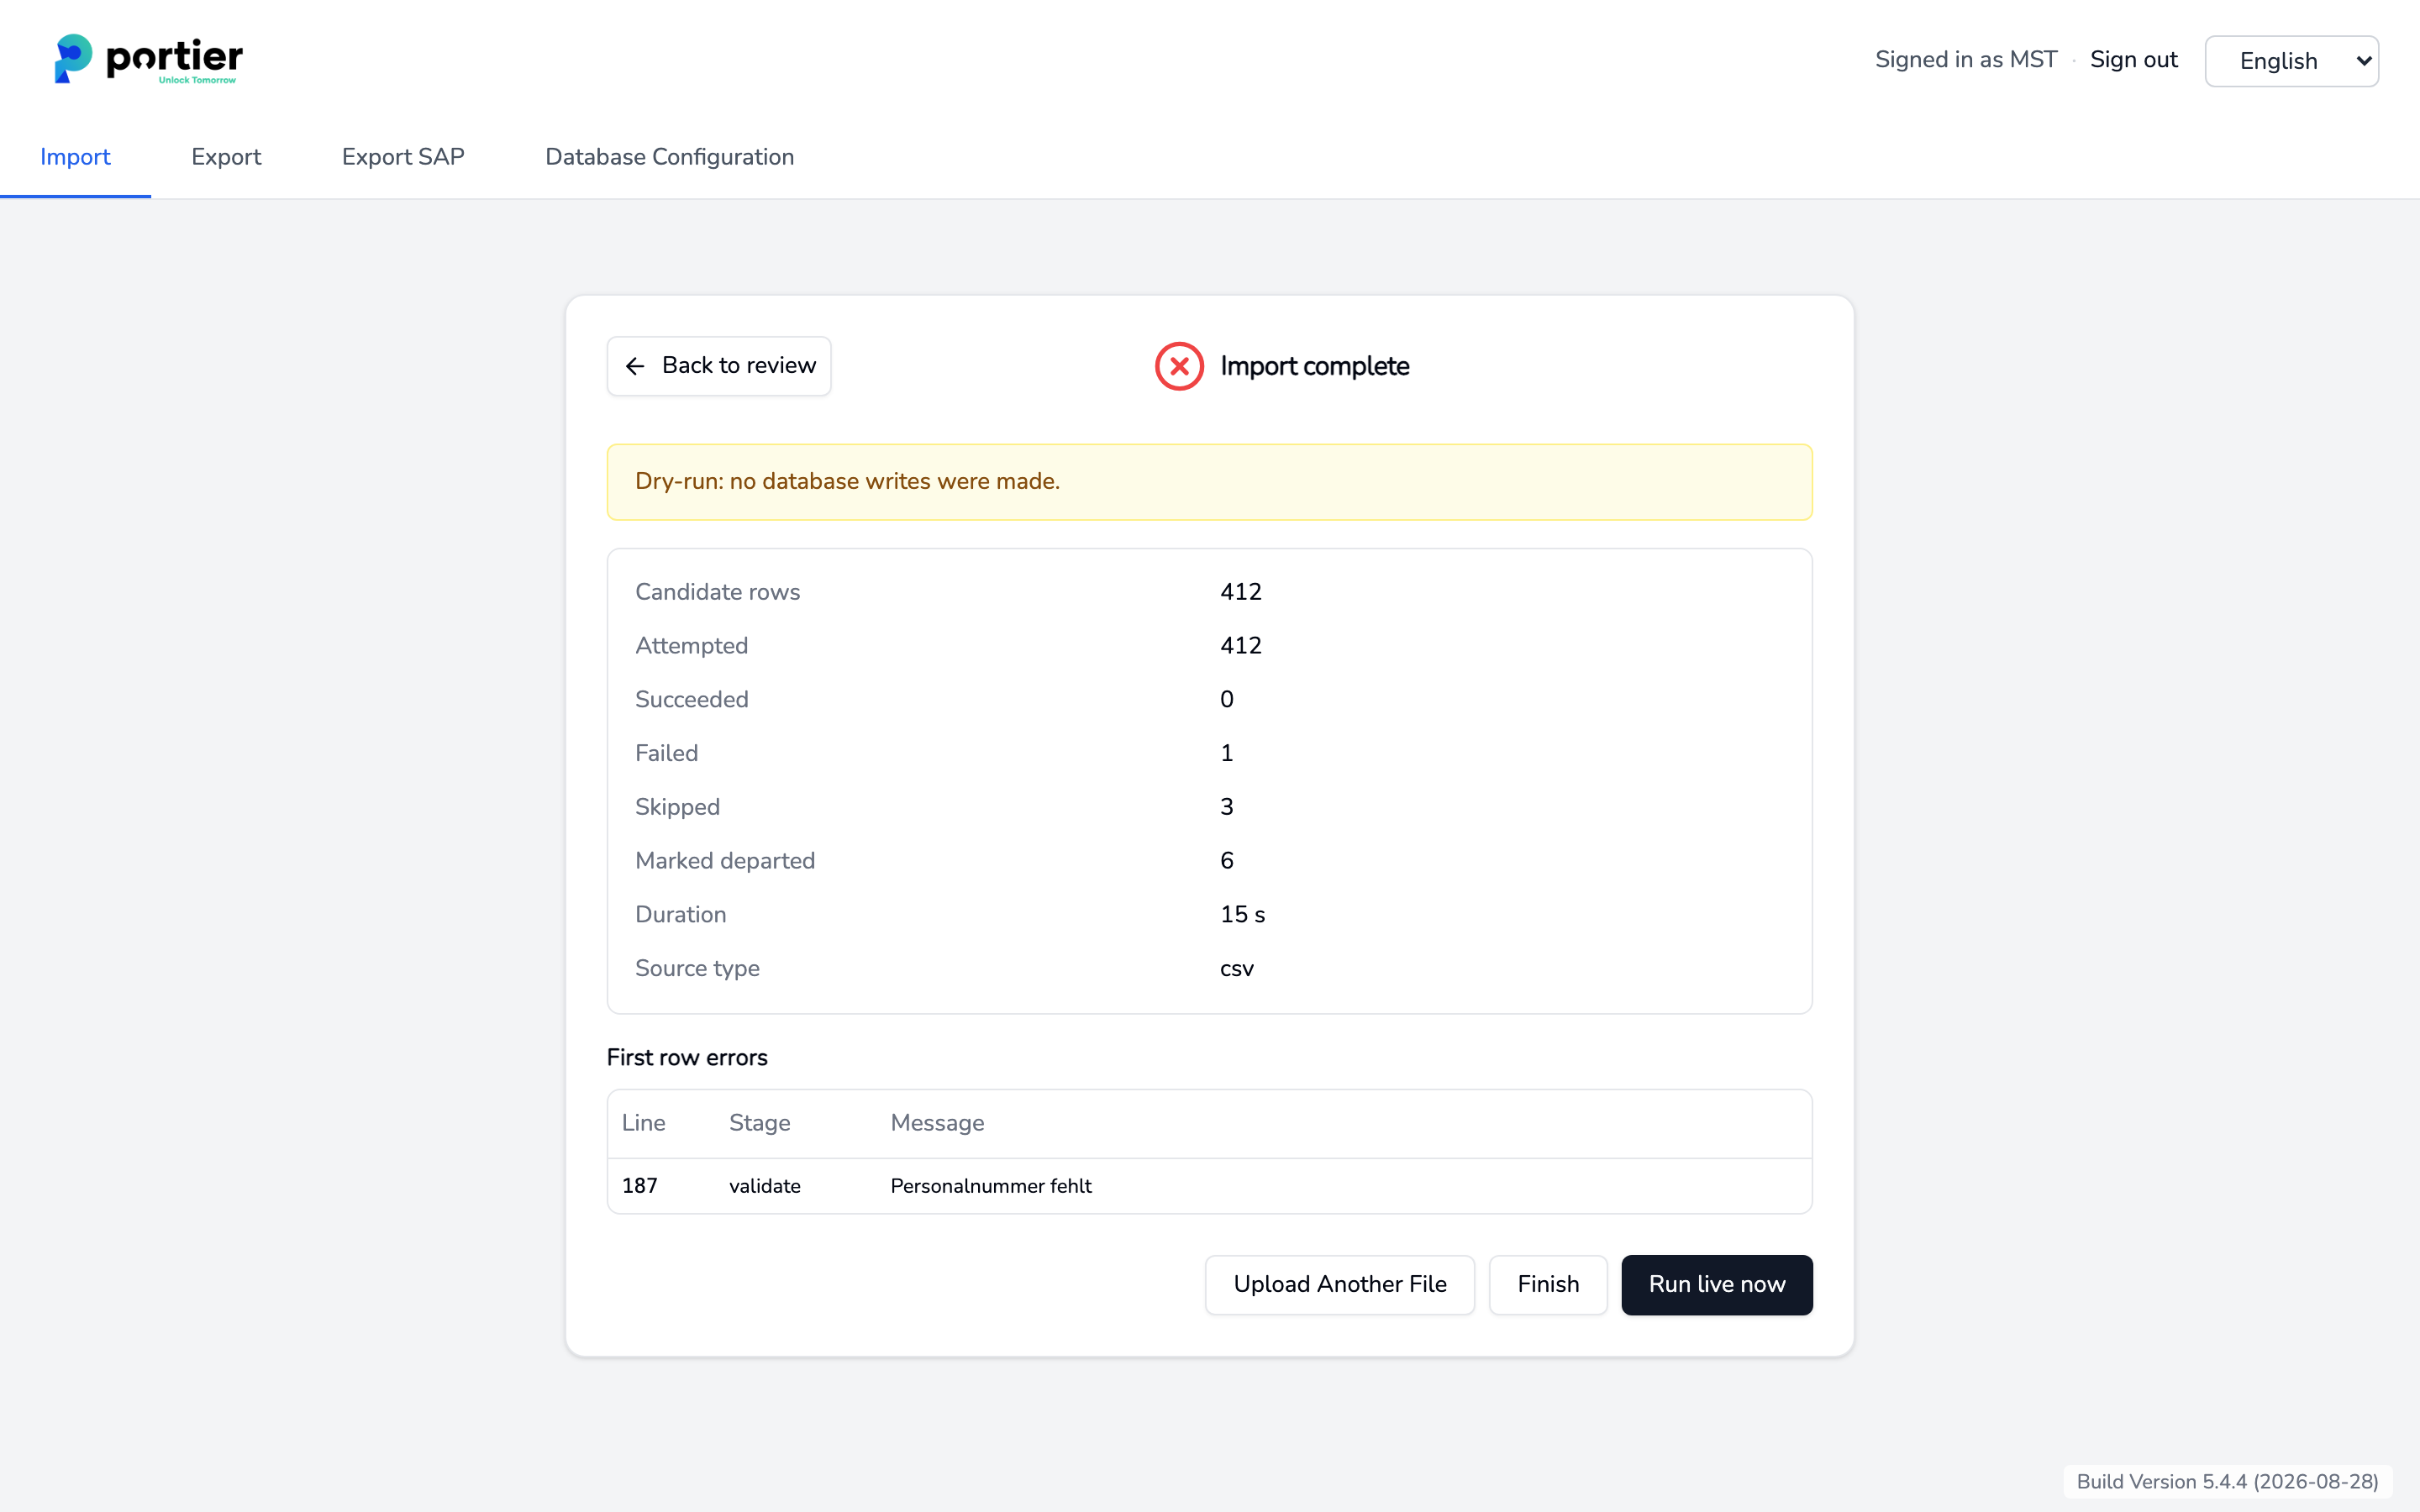
Click Run import. The result shows Candidate rows, Succeeded, Skipped and Failed, plus the first bad rows under First row errors.
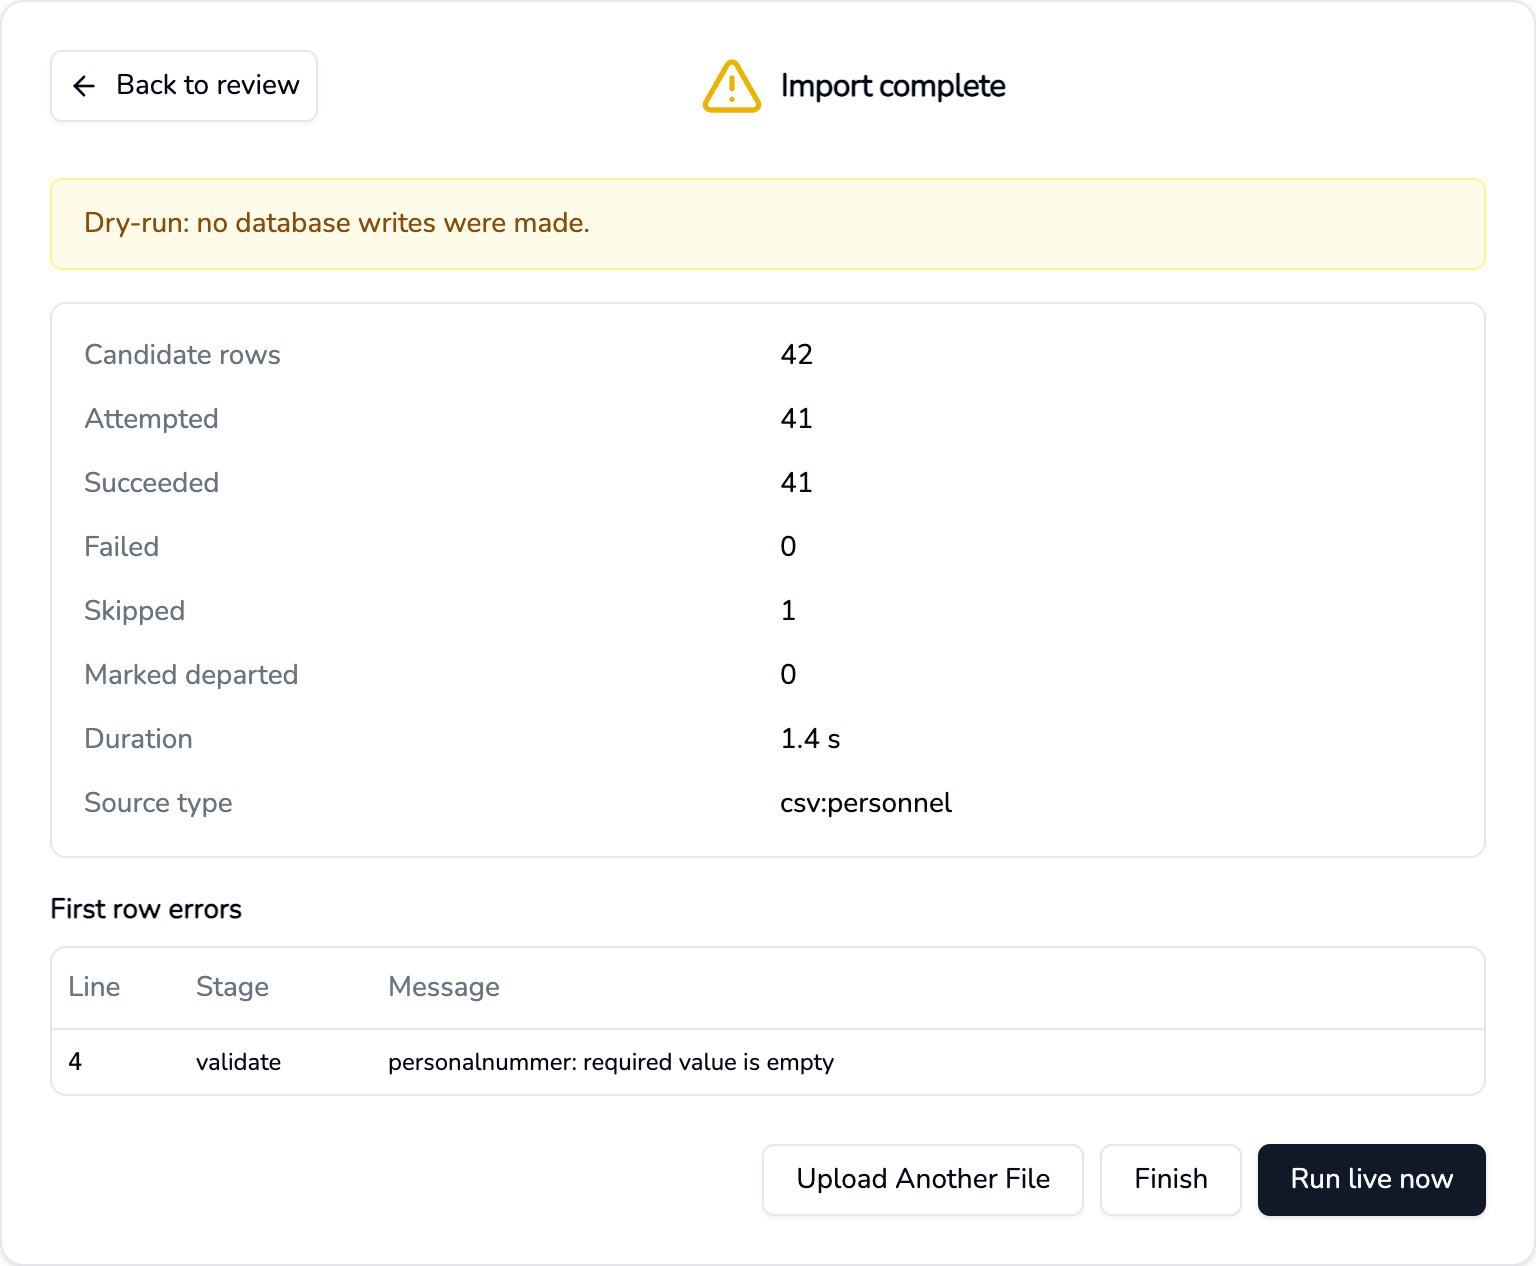
If the result looks right, click Run live now and confirm. Companion names the candidate row count in the confirmation. The same run is then written to the database.
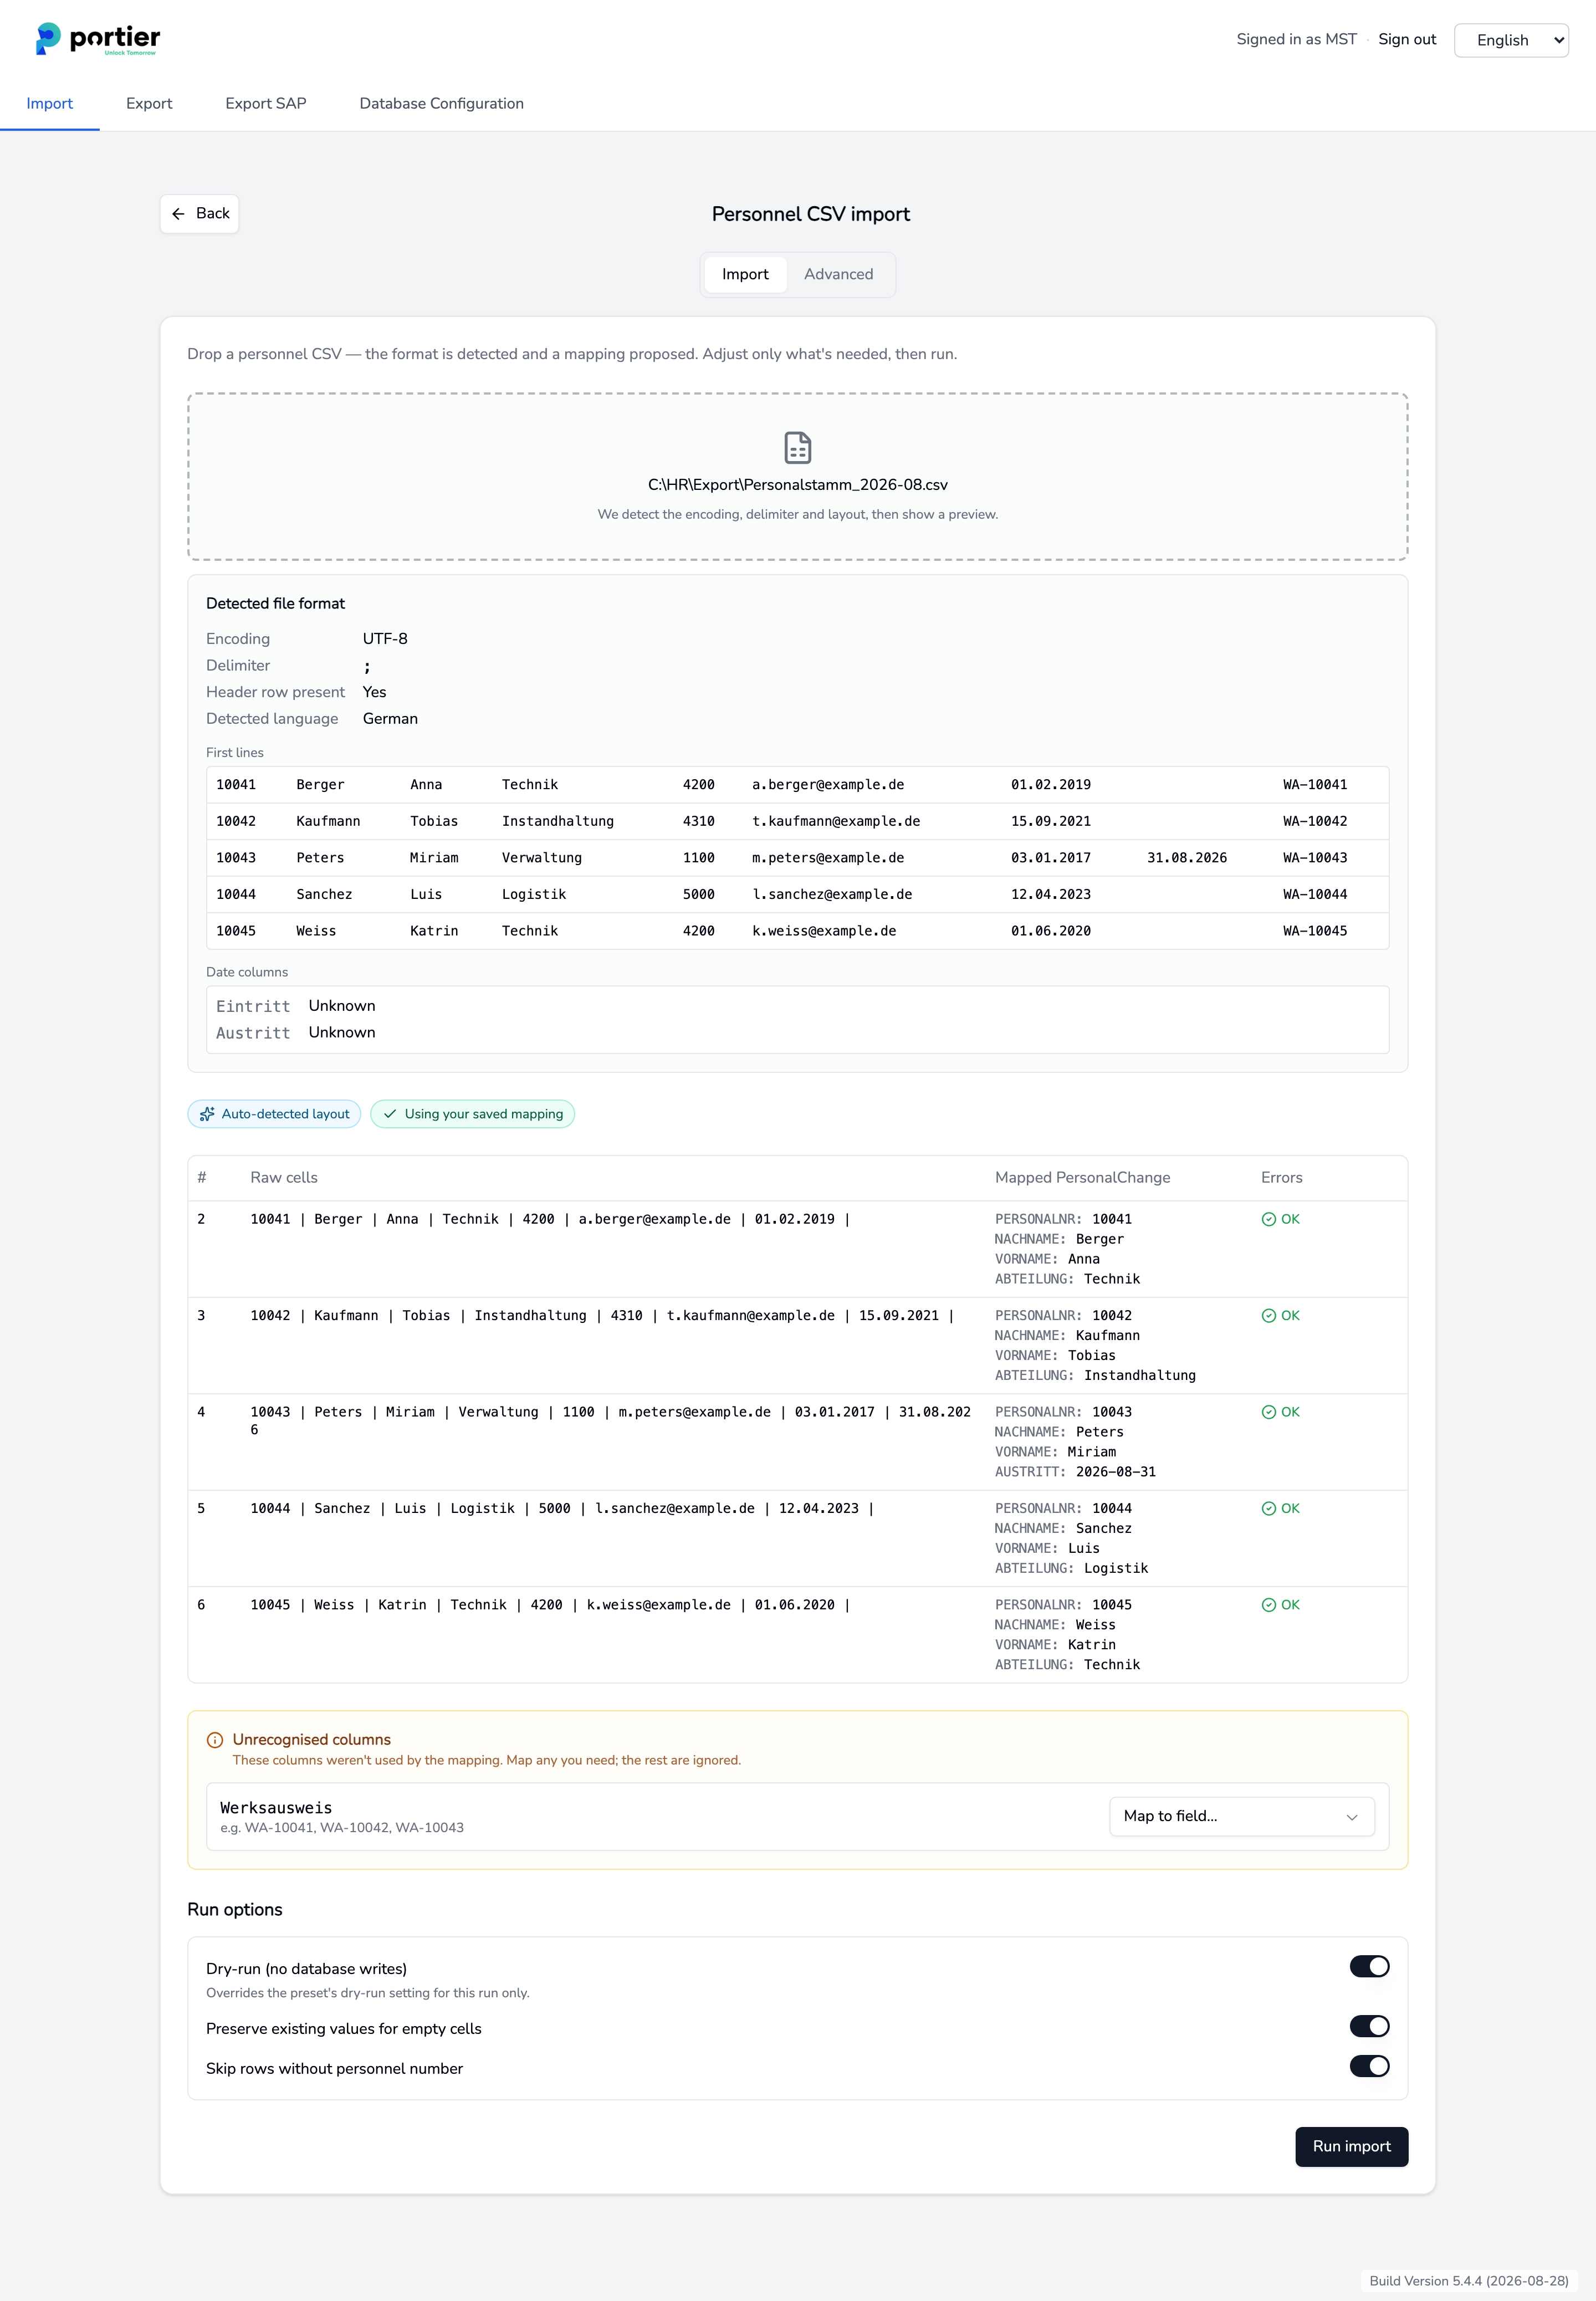
If you changed the mapping, keep it with Save as default or Save as default & run. It is then proposed for the next import. A preset shipped with the product stays untouched, Companion saves an editable copy instead.
Companion knows 36 fields. Which column goes to which field is set by the mapping, not by its position in the file.
Required: personnel number.
Person: salutation, Name_1, Name_2, additional name, search term, date of birth.
Address: street, country code, postcode, city.
Contact: work phone, private phone, fax, mobile, e-mail, web.
Employment: department, area, cost centre, job title, room, employee group, start date and time, end date and time, competency level.
Remarks: remark 1 to 3.
Supervisor: the supervisor's personnel number. Companion resolves it against the imported people after writing.
PIN and RFID: available, but off by default. They are imported only if you enable them in the preset. Presets sit on the Advanced tab under preset library, headed Personnel import presets in Companion,. The switch in the preset editor is Show sensitive fields (PIN, RFID).
Advanced: presentation date and time zone.
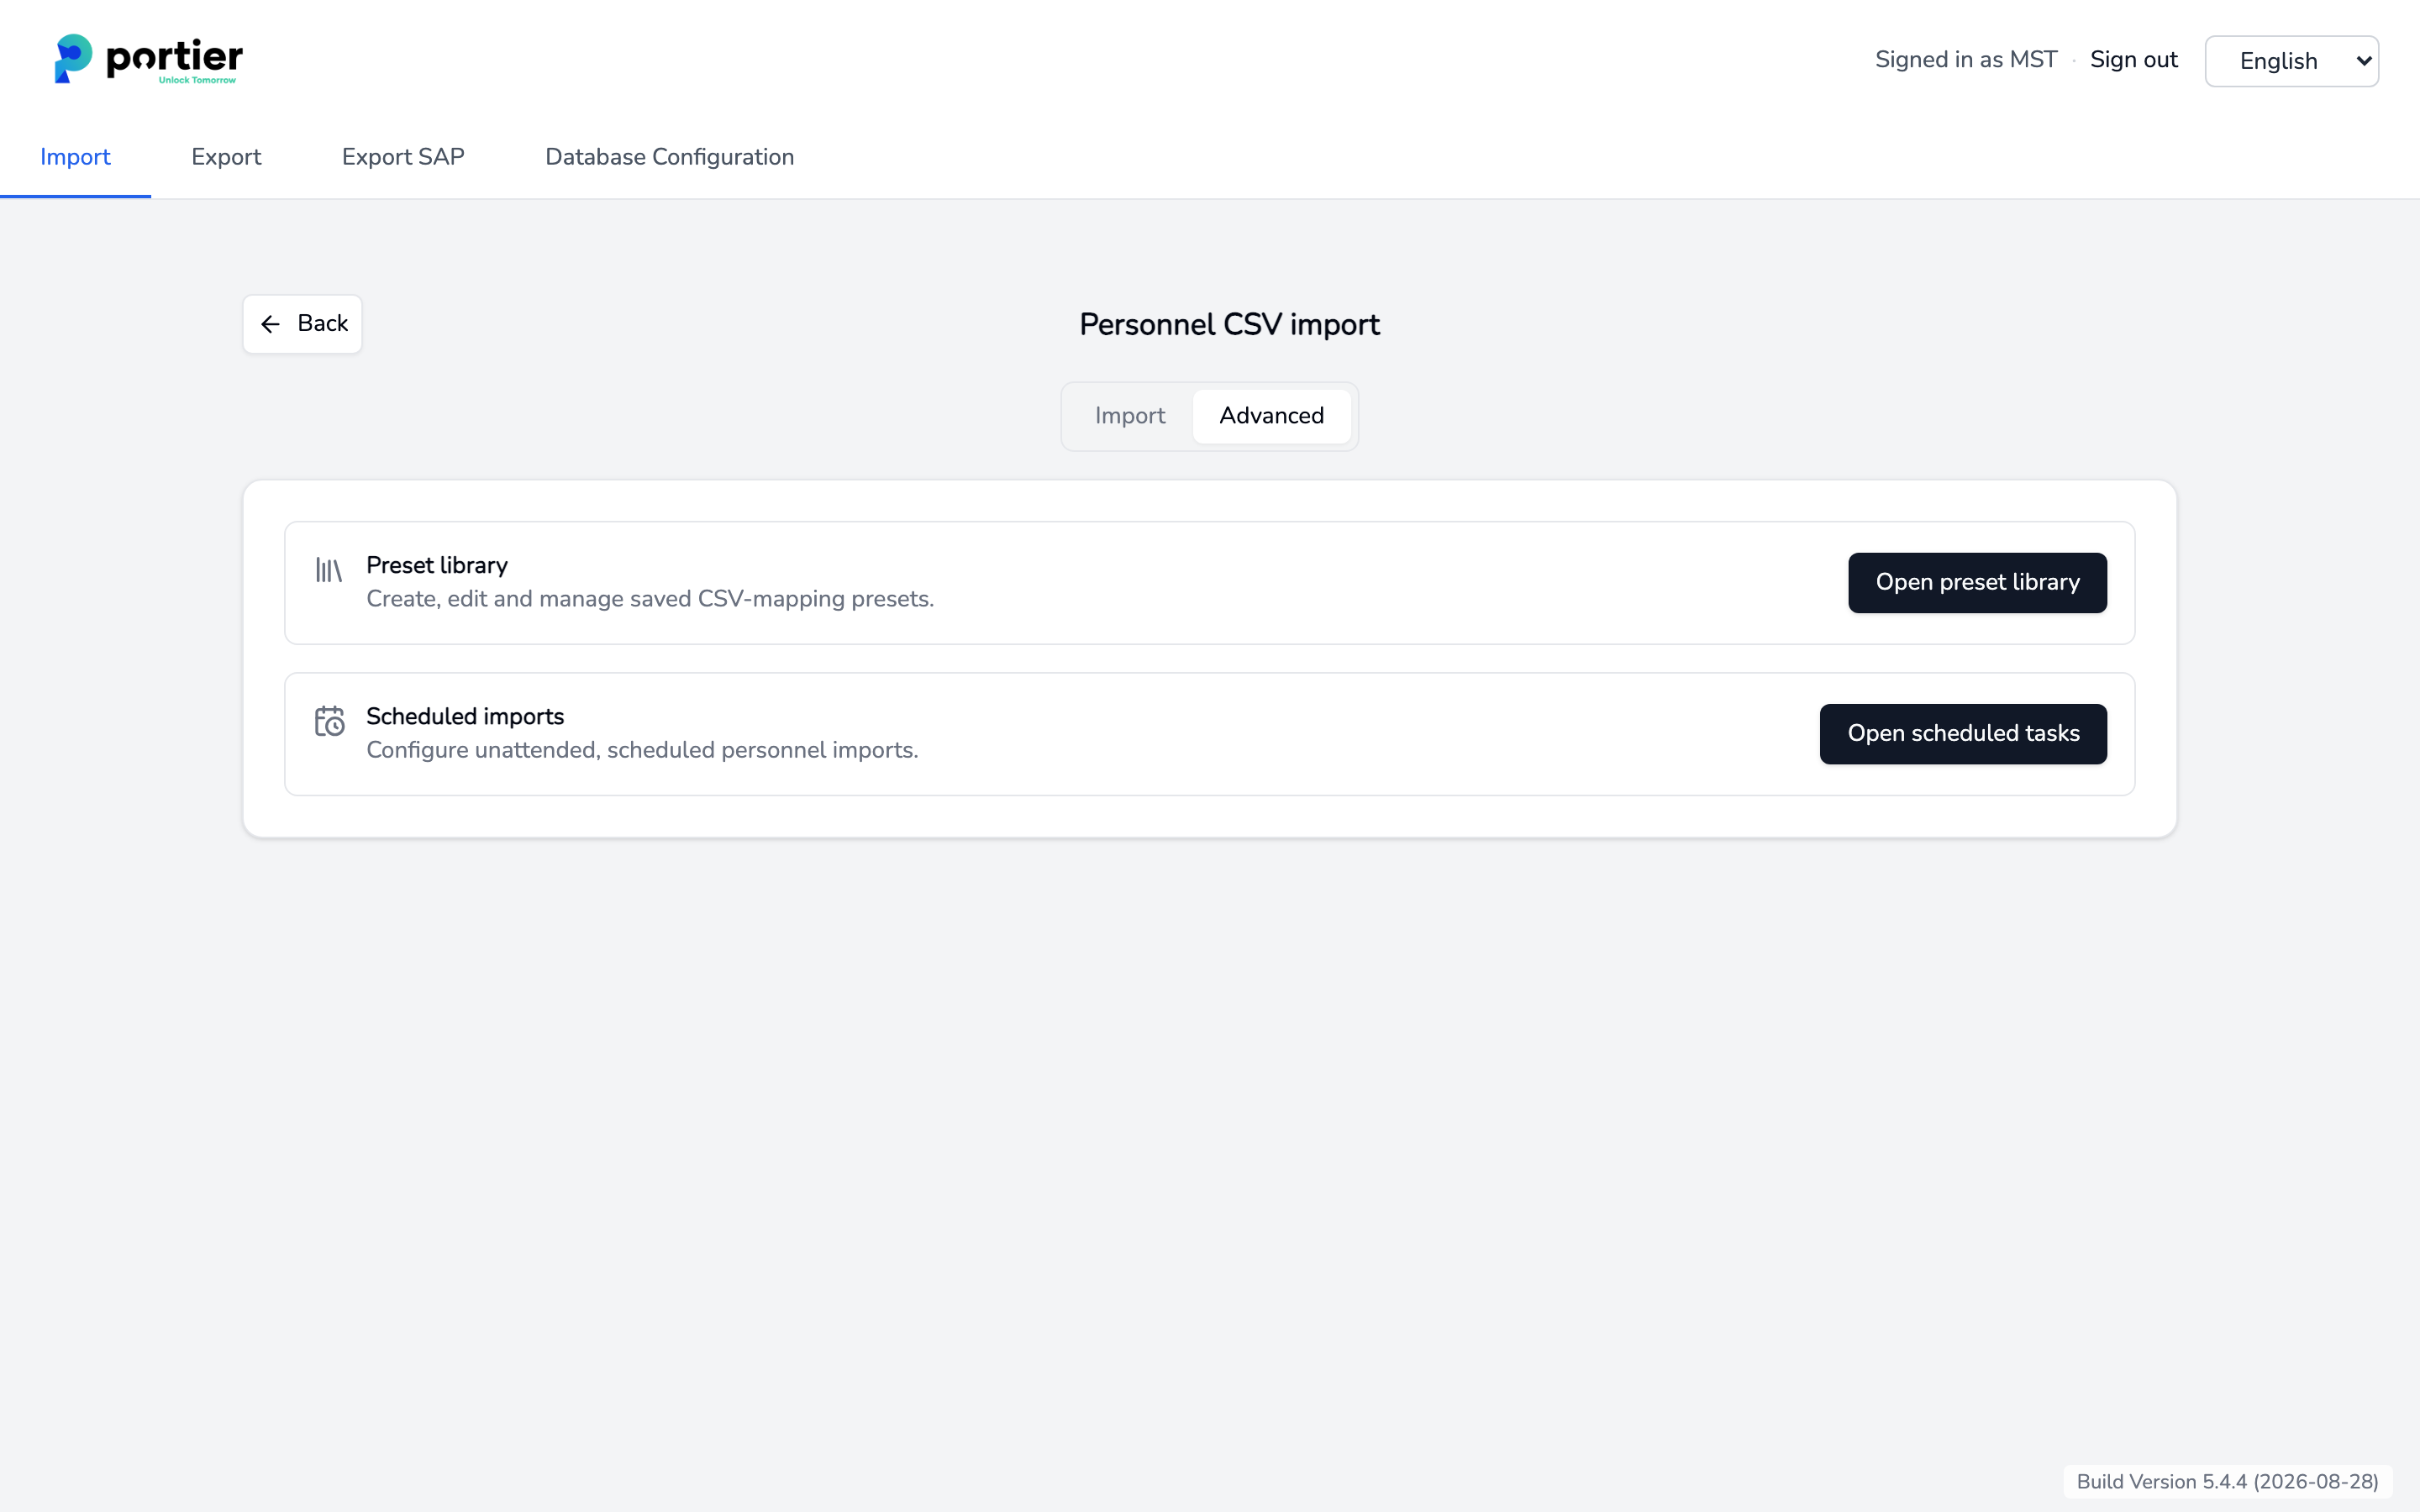
The Advanced tab holds the two things the everyday import does not need, the Preset library and Scheduled imports.
A preset describes a file. Mapping mode, encoding, delimiter, header row, the column mapping and the default run options. Open preset library takes you to the list.
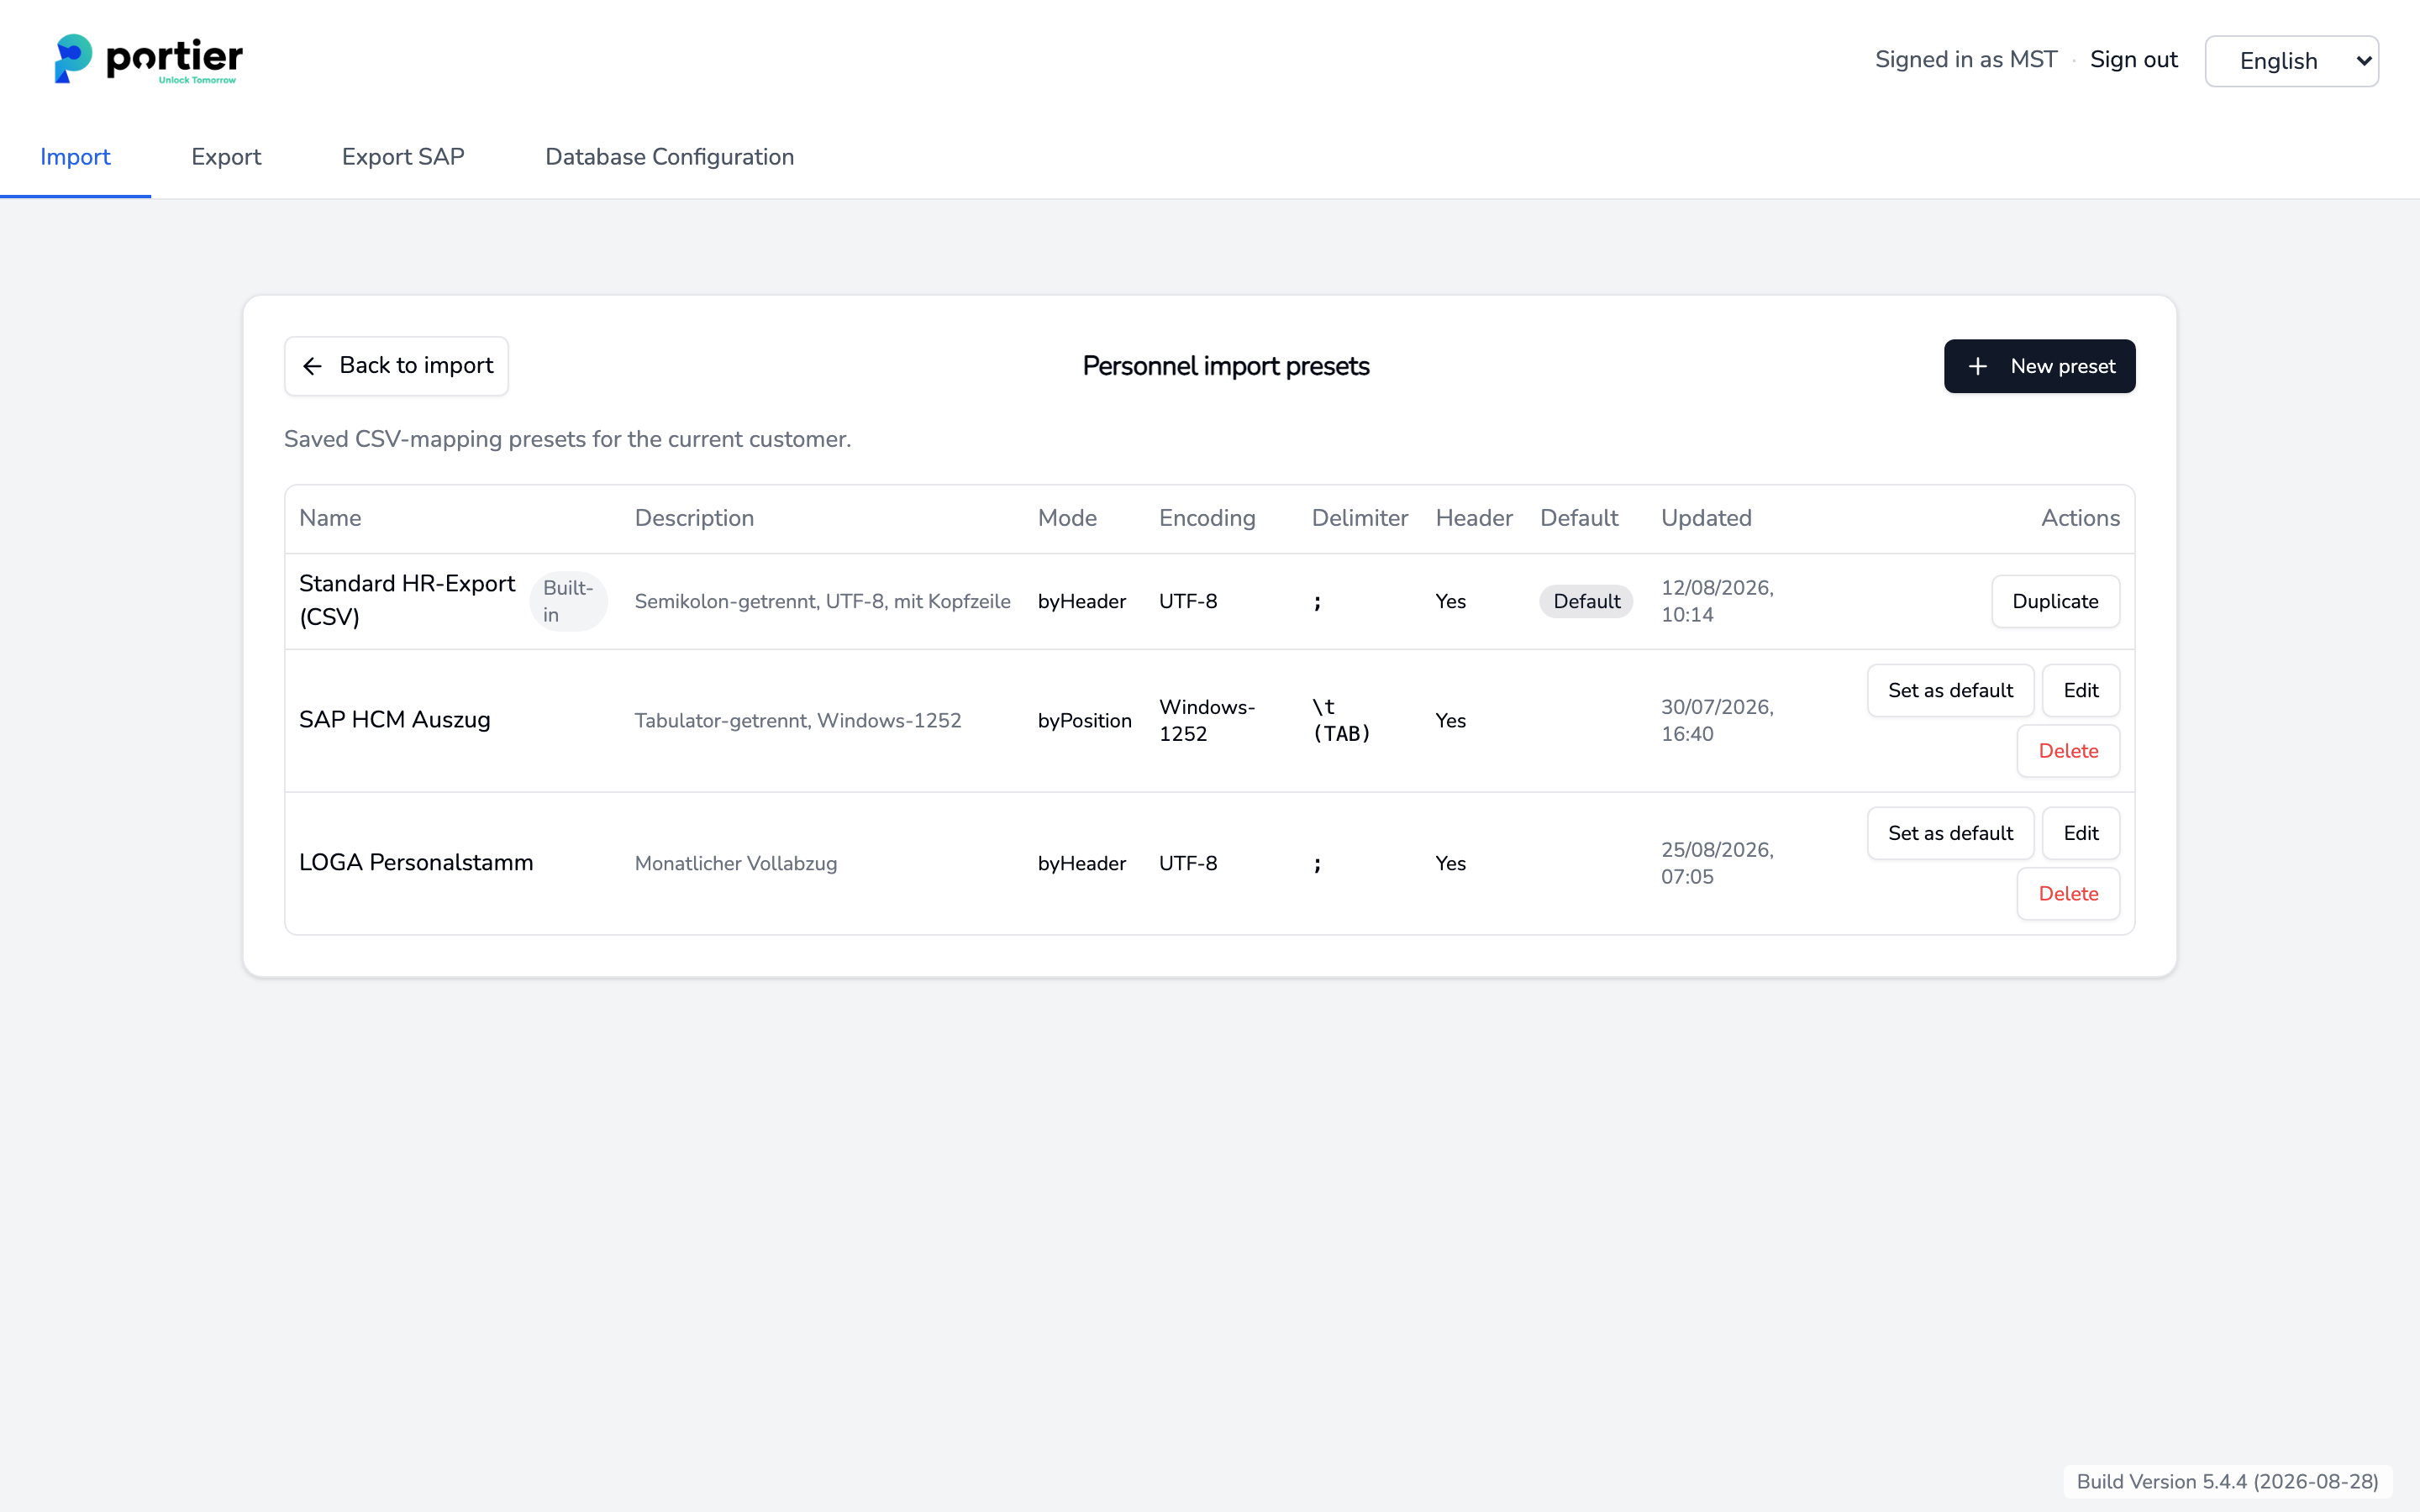
New preset creates one, Edit opens it, Duplicate makes a copy.
Set as default decides which preset is proposed when you open the import. Exactly one per customer key carries the Default badge.
Presets marked Built-in come with the installation. They cannot be edited or deleted. Duplicate one and work on the copy.
Delete cannot be undone.
The editor lists General, File format, Default run options and Column mapping one below the other.
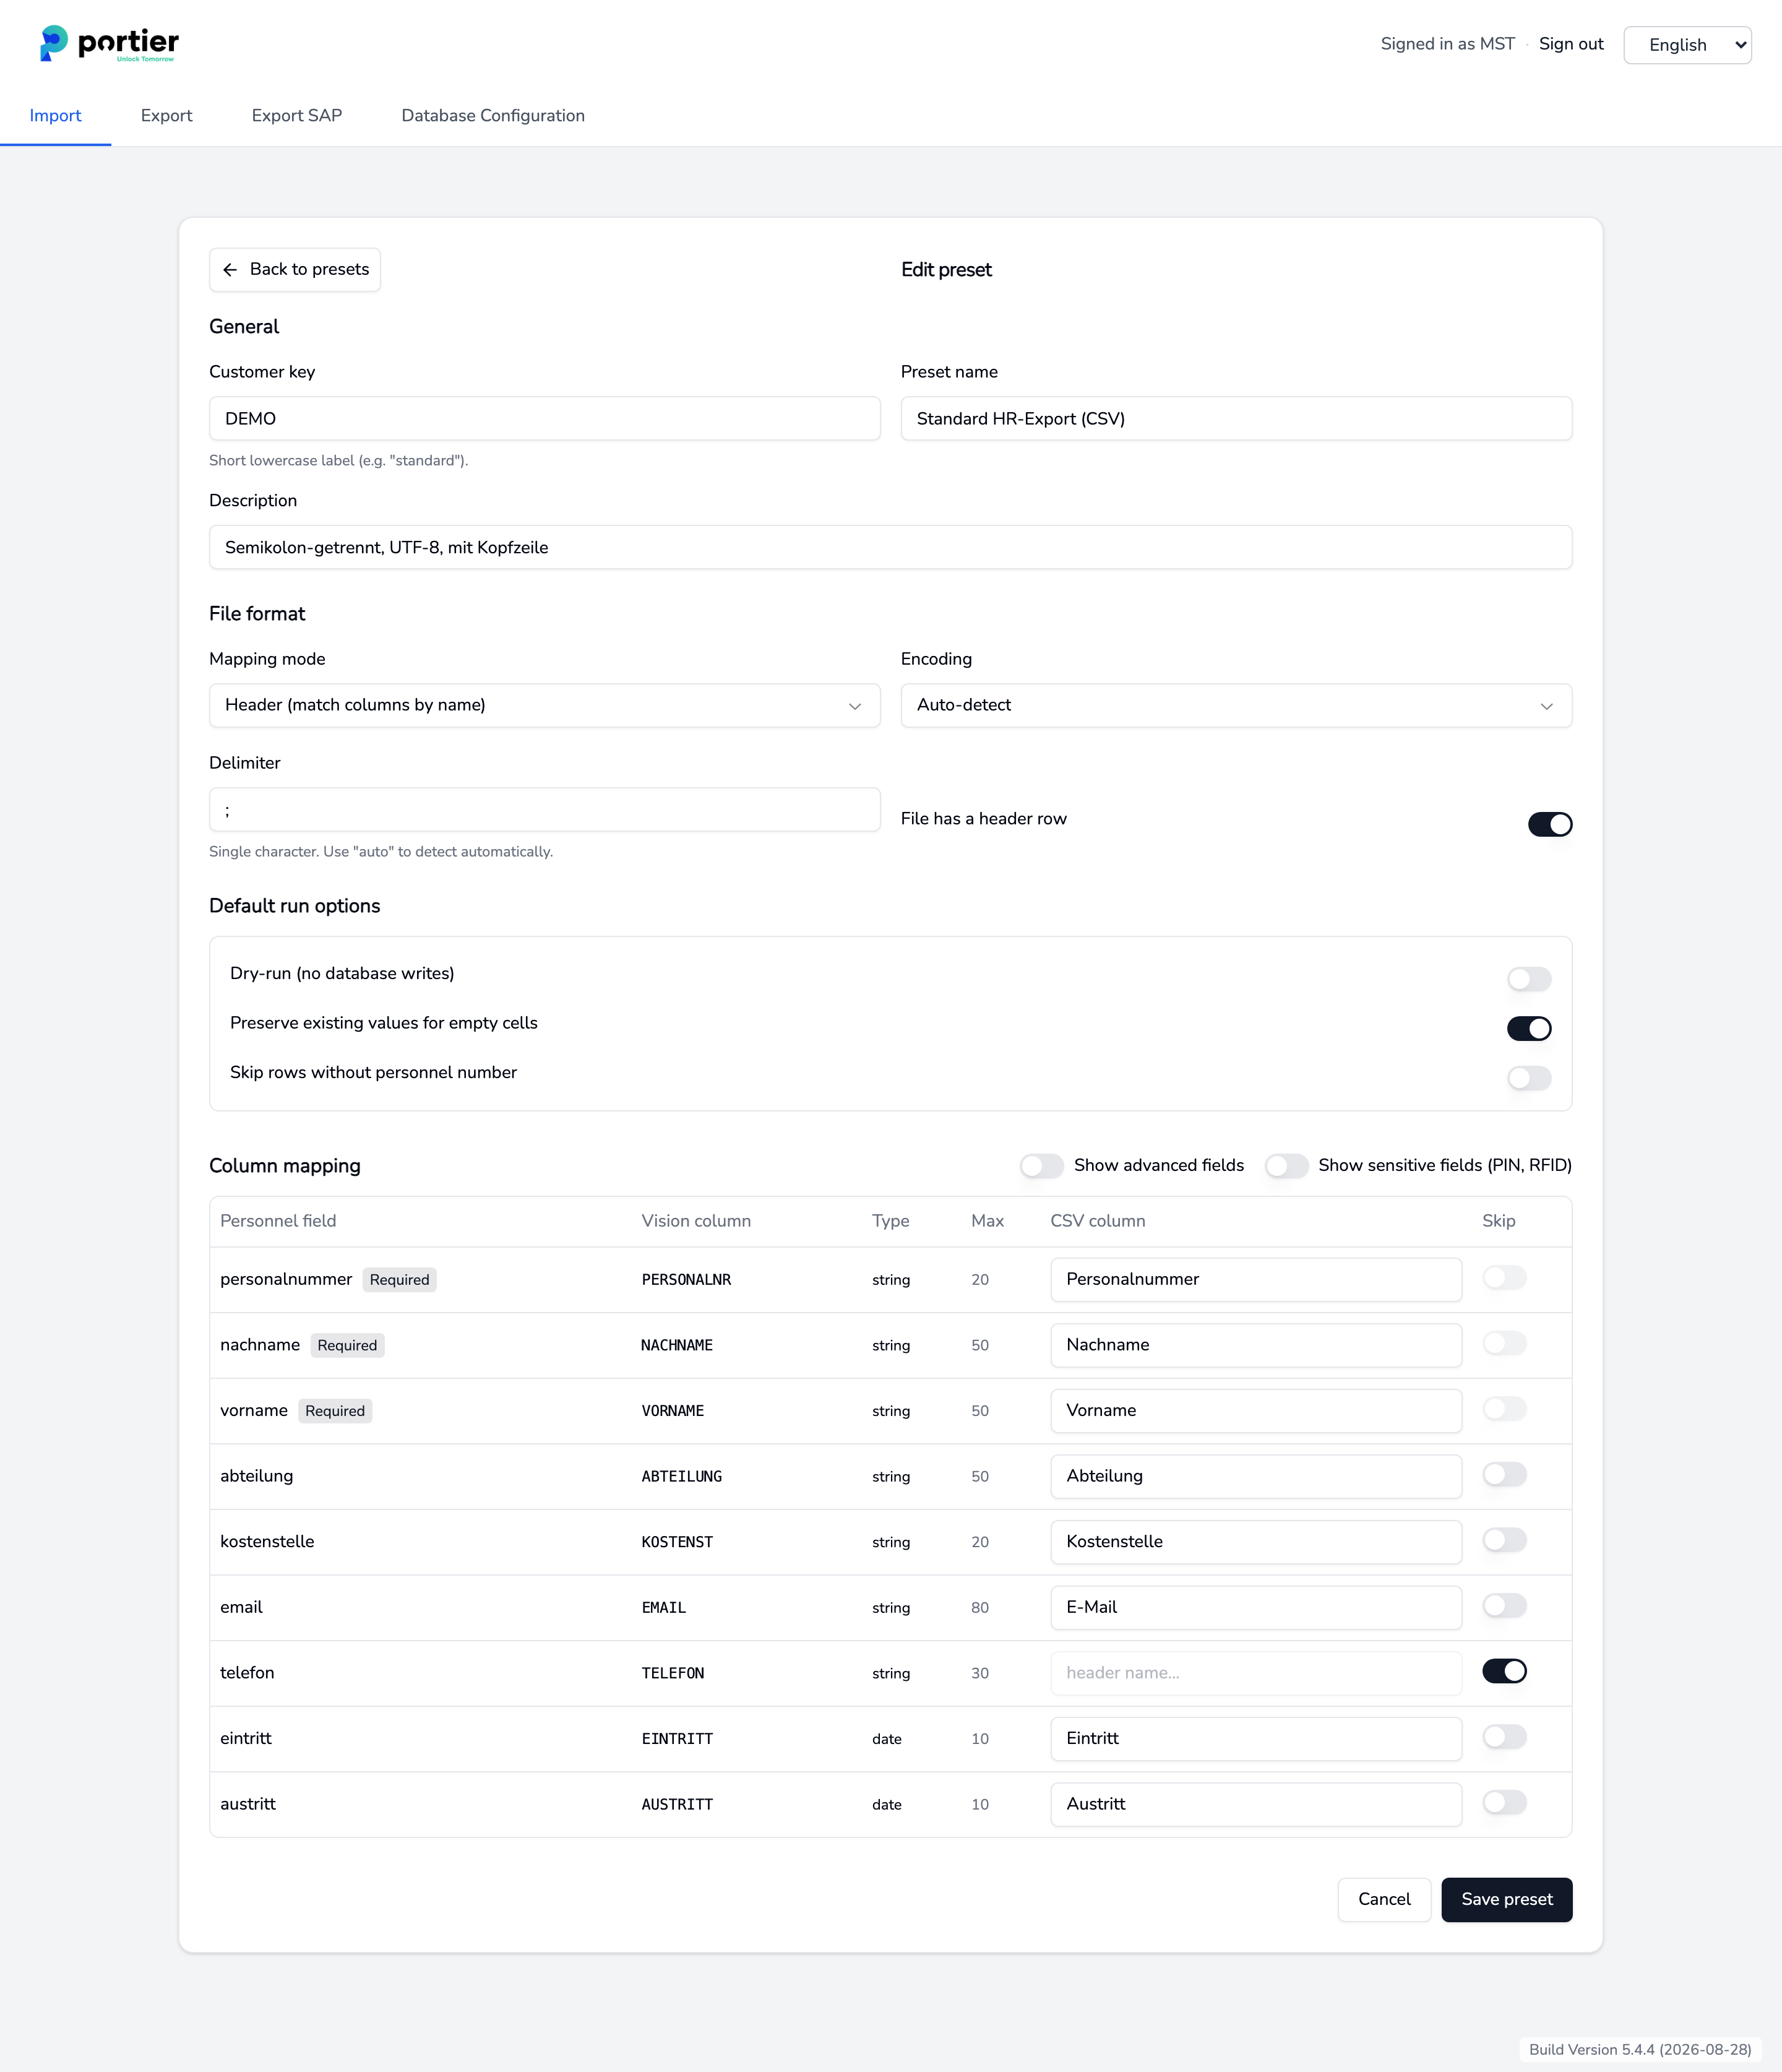
Mapping mode decides whether Companion reads the columns by header or by position. A file without a header row needs Positional (match columns by index).
Under Column mapping, give each personnel field its CSV column. Skip leaves a field alone.
Show advanced fields and Show sensitive fields (PIN, RFID) bring the remaining fields into the table.
Save preset applies your changes.
Open scheduled tasks sets up an import that runs without you, daily or hourly, from one fixed file or from a folder with a filename pattern. The article "Scheduled tasks and service status" covers it. A preset is called an Import preset there, it is the same thing.
A scheduled run reconciles departures exactly as a manual live run does. Read the next section before you set one up.
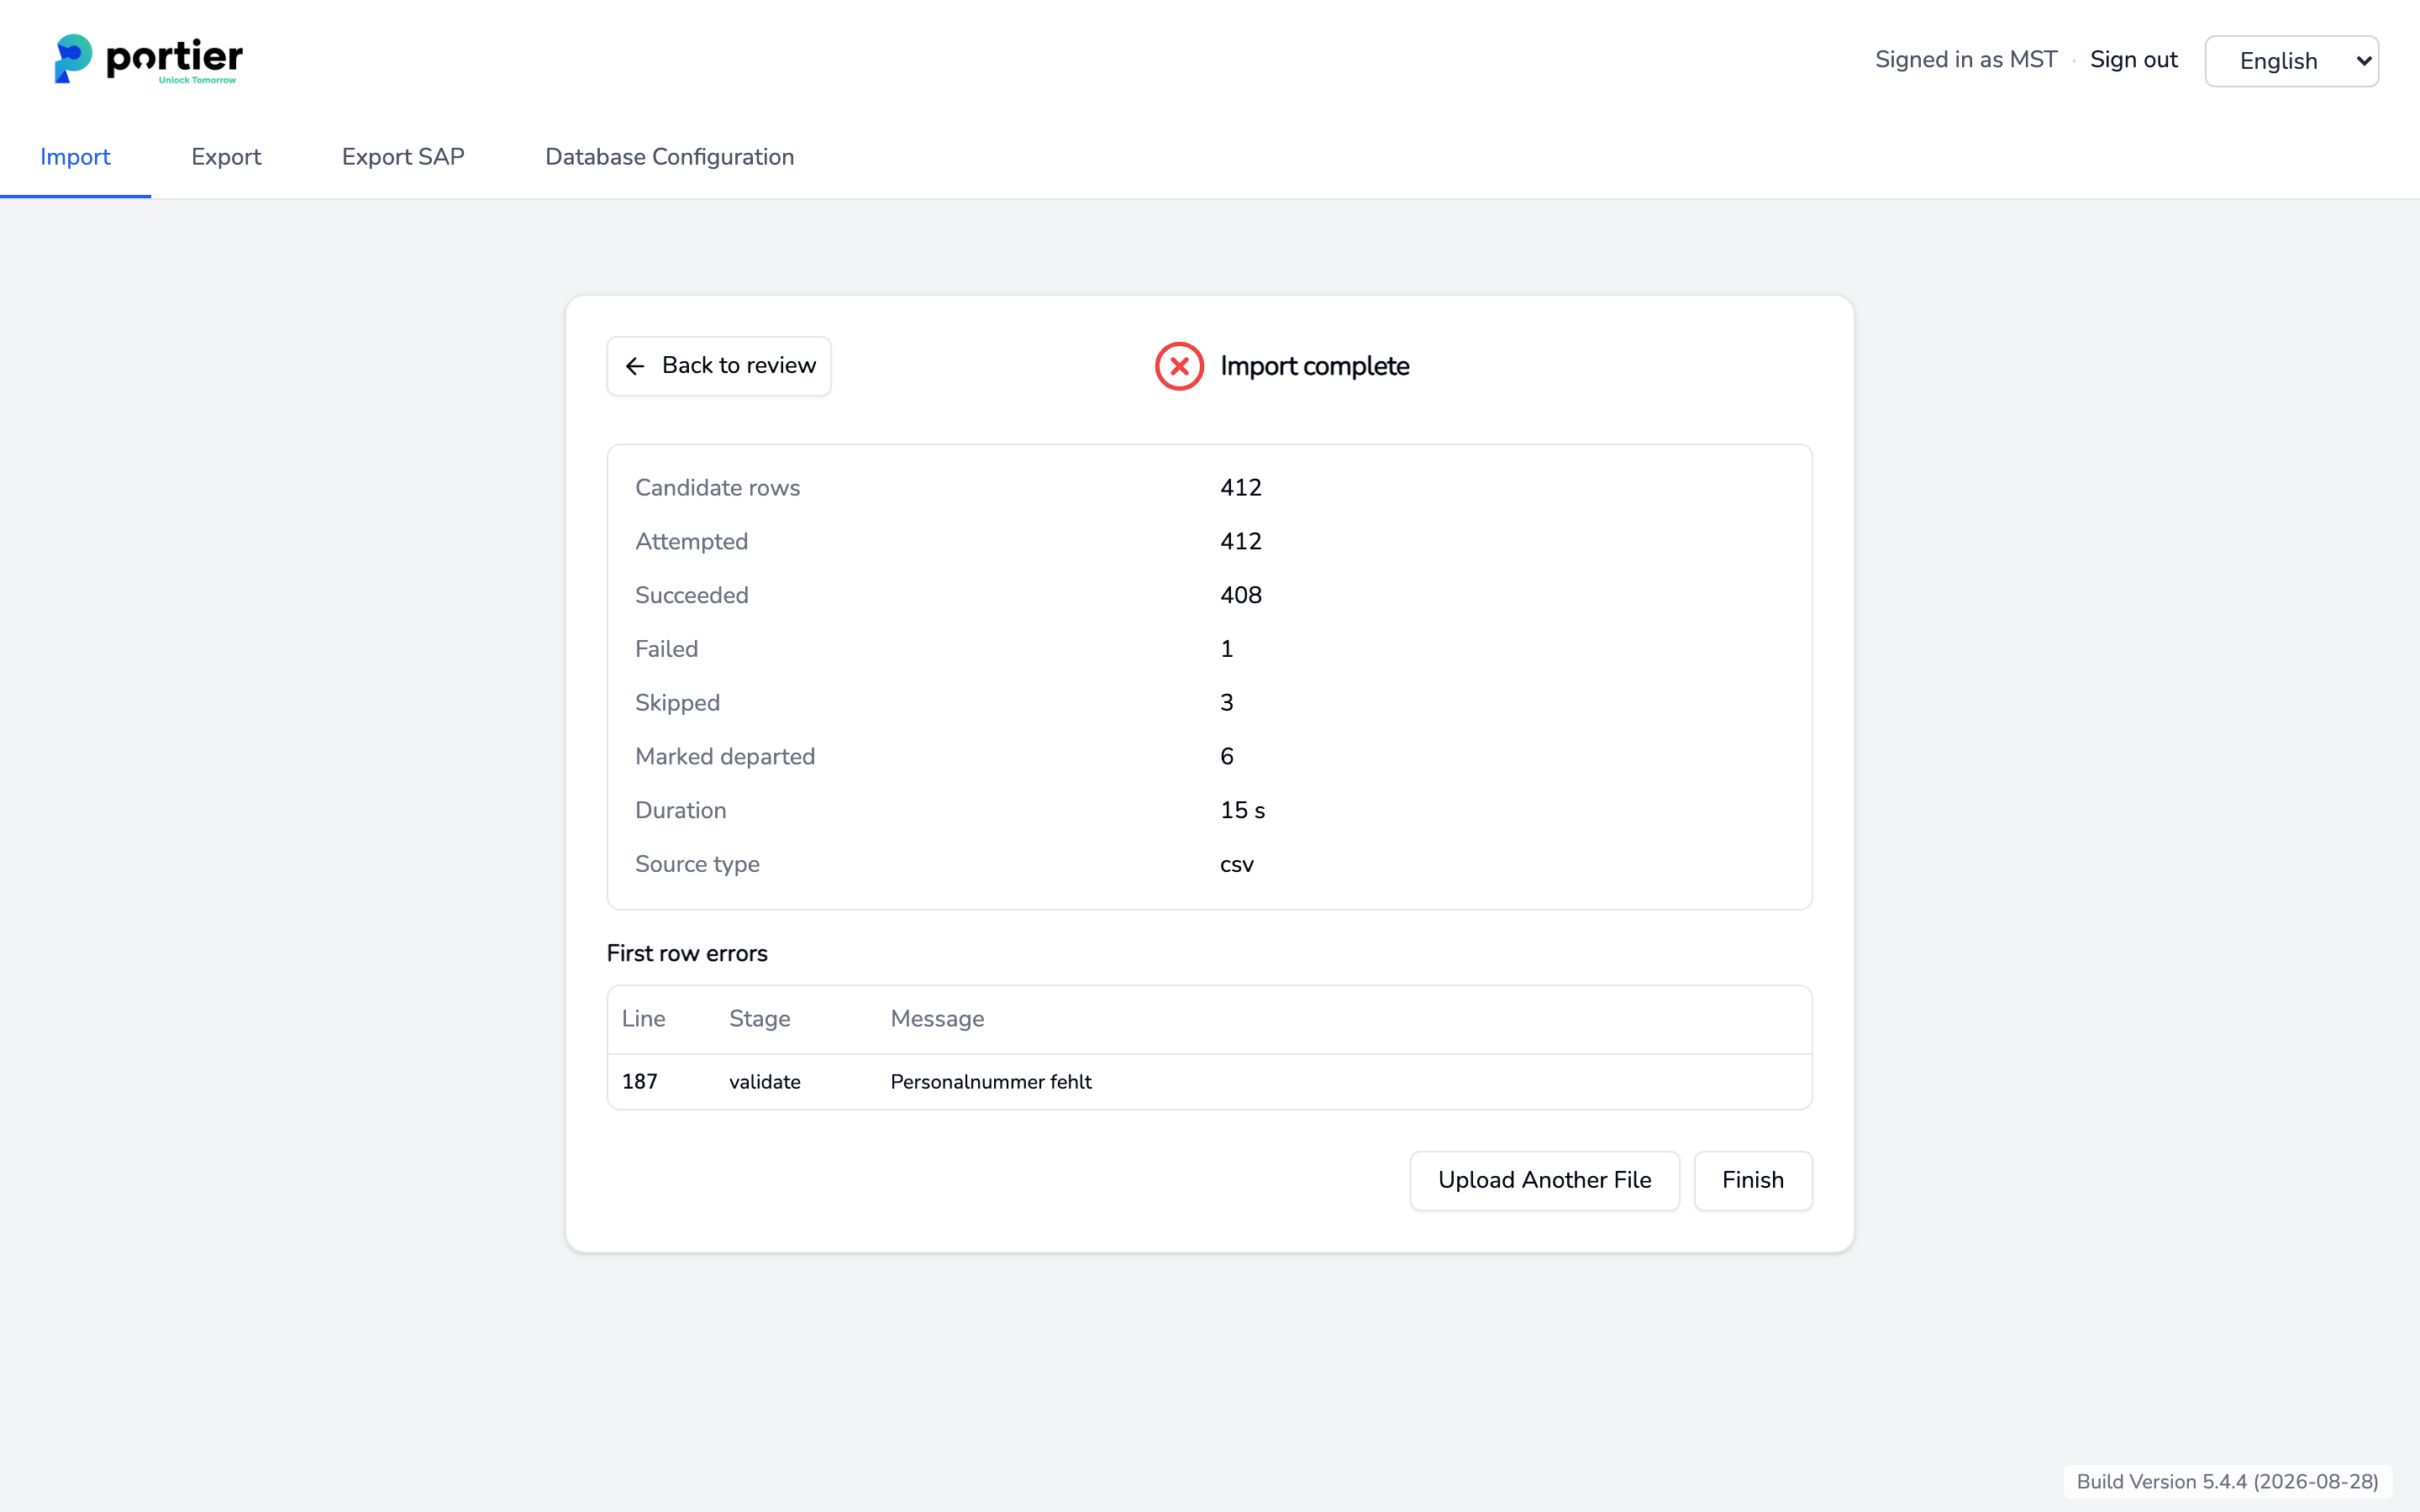
After the rows are written, the live run looks for everyone an earlier personnel CSV import created who does not appear in this file. Those records are marked departed. The number is in the result under Marked departed.
The sweep counts across presets. Every personnel CSV import writes the same Source type, so a run with preset A also marks people imported with preset B.
People created by hand in Vision and people from the Entra ID sync are not affected. A person created by hand whose personnel number appears in an imported file is adopted by the import, though. From then on they belong to it.
The dry run does not do this, so the number only appears after the live run.
There is no safety threshold. An export carrying 40 rows instead of 400 marks 360 people as departed. Companion does not ask and does not stop.
Three things protect you.
Compare the Candidate rows number from the dry run against your headcount. A large gap means something is wrong with the file.
Always import the complete personnel file, never an extract. The import has no notion of a subset.
On a scheduled import, set the minimum and maximum file age so a half-written or a stale export is never read.
If it does happen, the record is not deleted. Run the complete file again as a live run. Everyone back in the file becomes active again.
Empty cells overwrite nothing. Preserve existing values for empty cells is on by default.
Rows without a personnel number are skipped. That is also on by default. Turn it off and they count as failures.
If a personnel number already belongs to a person from another source, the Entra ID sync for instance, the row fails. The existing person is left alone.
If a personnel number matches more than one record in Vision, the import reports the row as an error rather than guessing.