You set up the database connection in the portier Vision Companion. The Vision desktop has no screen for it. An existing locking system also reaches Vision through the Companion, by importing the locking-system file. Individual cylinders and key holders are entered directly in the Vision desktop afterwards, as described below.
When delivered, the user name is START and the password is also START. Change both before you go live. These credentials are for the Vision desktop. The Companion has its own sign-in and normally takes it straight from Vision.
In the MANAGEMENT / PERSONNEL module, enter the key holder's name in the NAME - 1 search field (the first letters of the surname are enough), then click SEARCH.
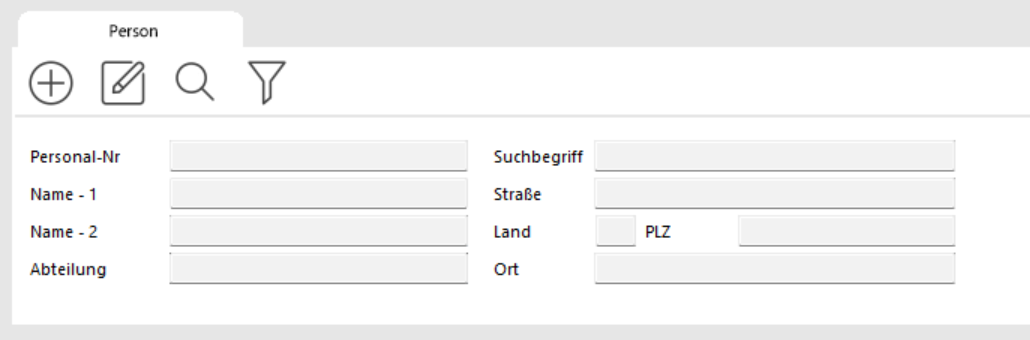
A list of matches is displayed.
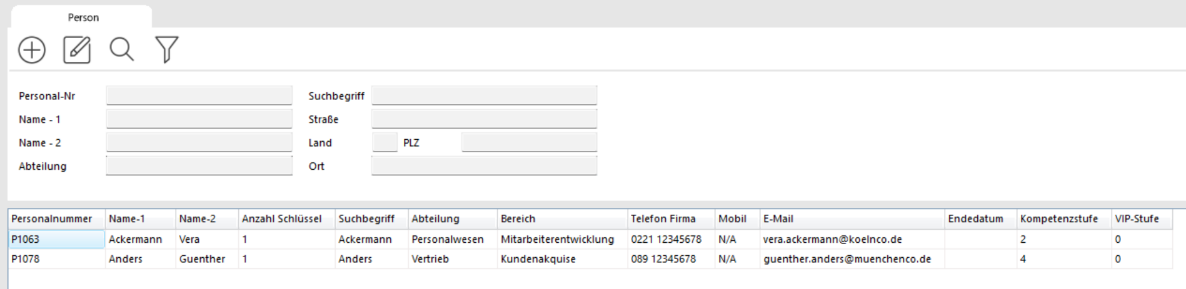
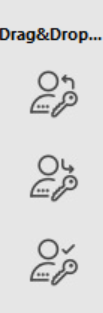
Find the key recipient in the list and drag them to the right onto the ISSUE button with the left mouse button held down.

If the person is not on file yet, choose ADD RECORD, enter the person, save, then press F5.
The KEY MOVEMENTS window opens.
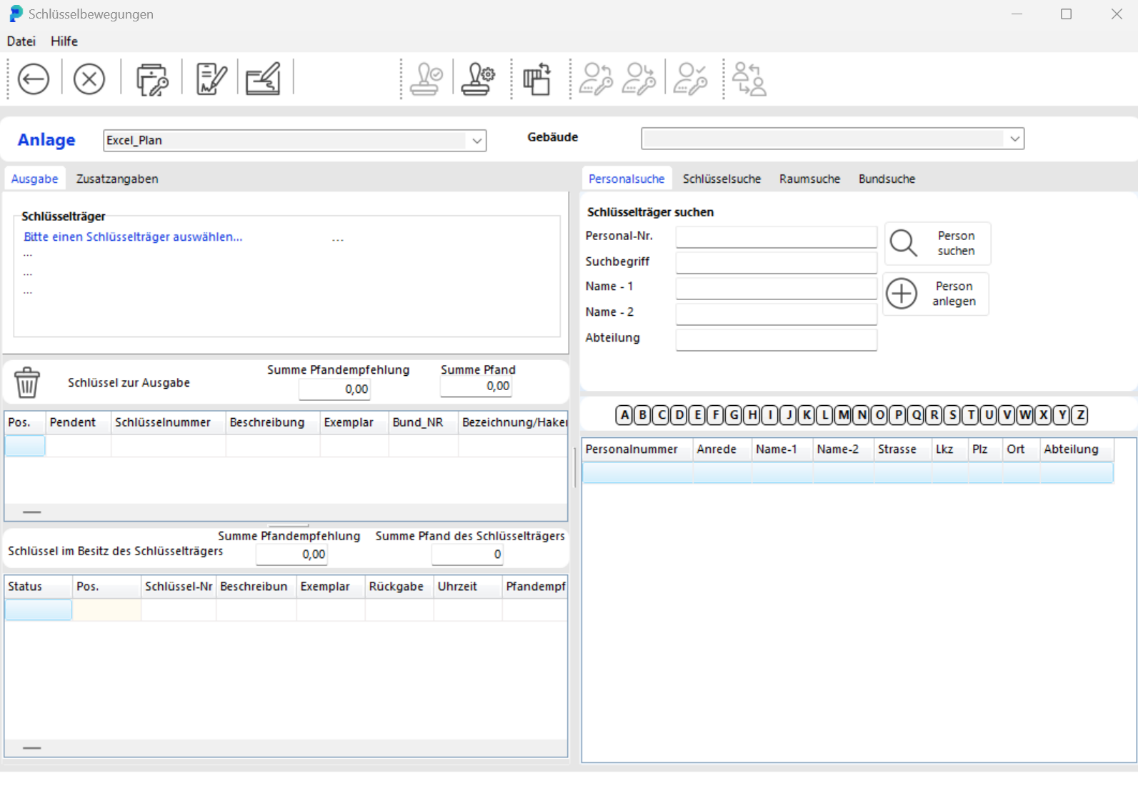
The recipient's details are already filled in.
On the right of the window, in the Key Search tab, enter the first characters of the key number in the Key Number field and click SEARCH KEY.
A list of matching keys is displayed. Click the key you want to issue. The lower part of the window then shows the available copies of that key.
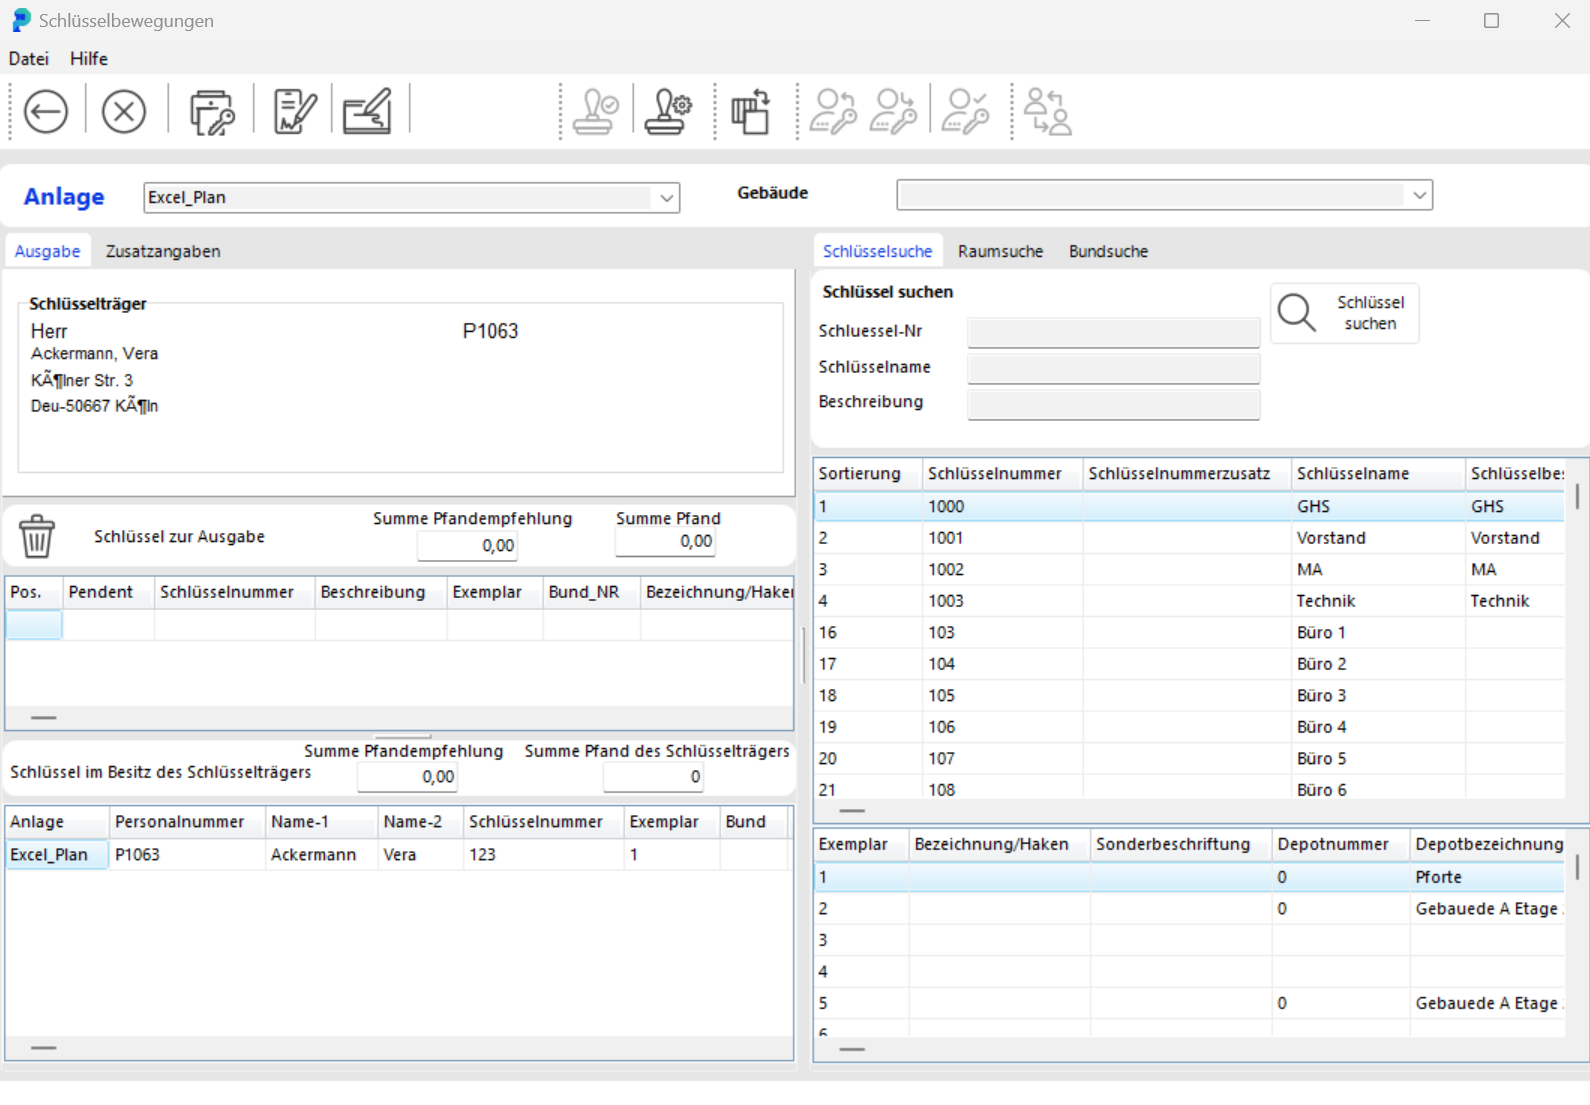
Double-click the copy you are issuing in the lower part. Its key data moves into the left part of the window (Key for issue). portier Vision manages key issue down to the individual copy. If your copies are numbered correctly, check which copy you are handing over and select exactly that one from the list (copy 3 in the screenshot).
The date and time of issue are entered automatically. Complete the issue details where needed, for example the return date.
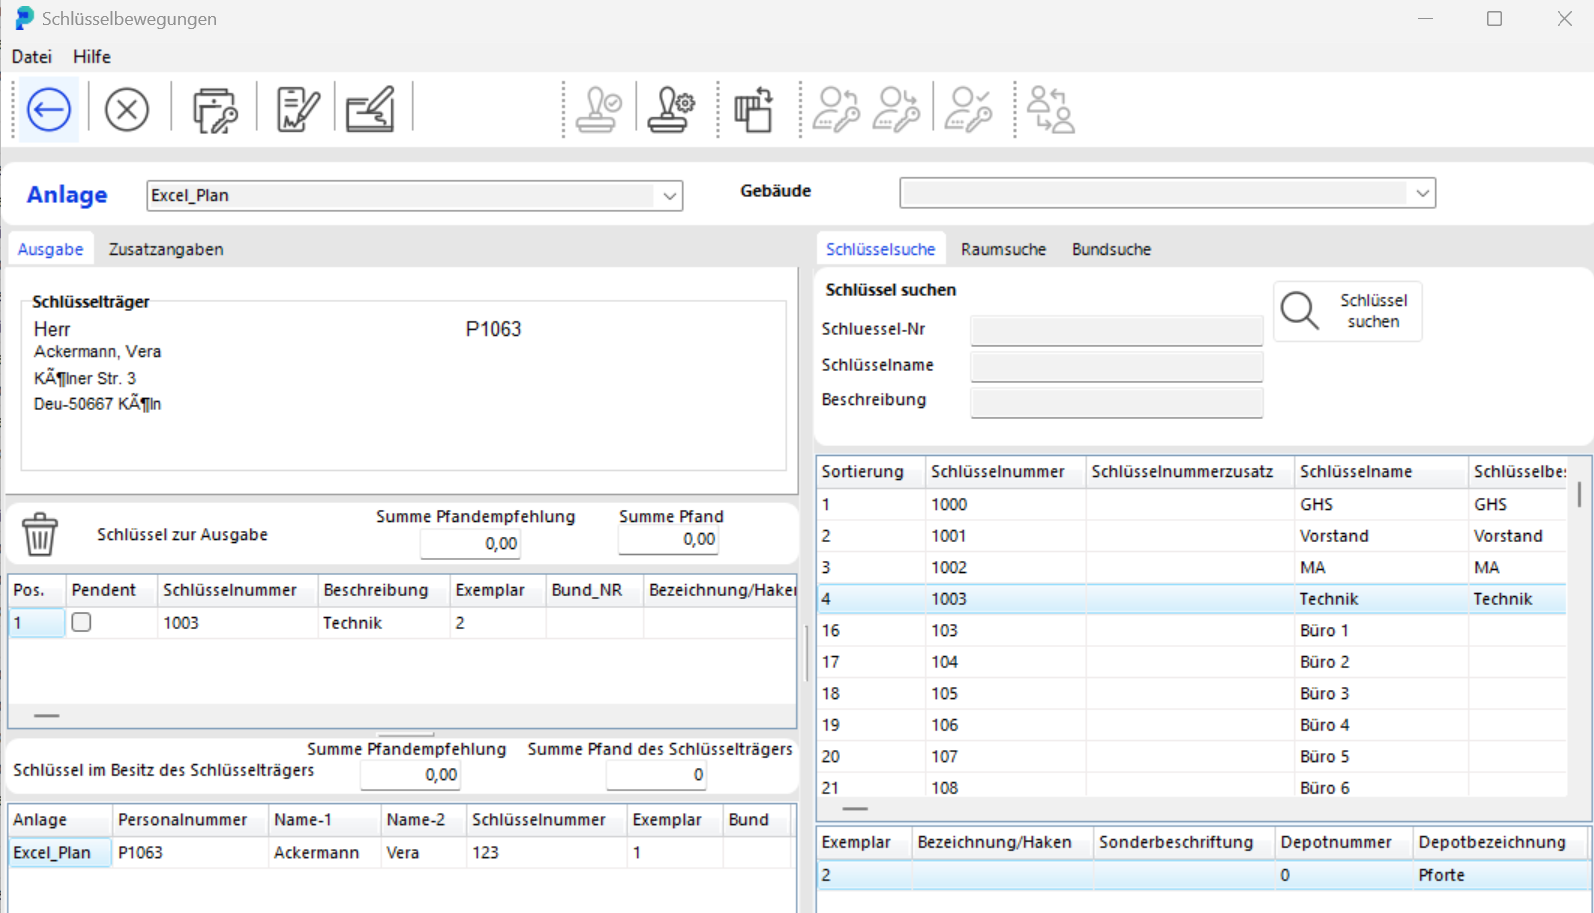
Post the key issue by clicking the diskette button, or the button next to it if a DigiPad is connected.

Printing, or output on the DigiPad, happens automatically. If print preview is switched on, the ISSUE SETTINGS window opens.
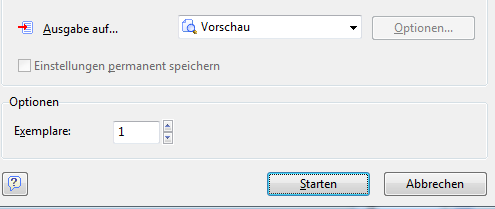
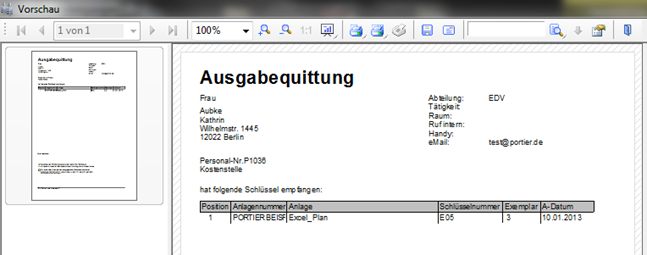
Click START here to display a preview of the issue receipt.
In the MANAGEMENT / PERSONNEL module, enter the key holder's name in the NAME - 1 field (the first letters of the surname are enough), then click START SEARCH.
A list of matches is displayed.
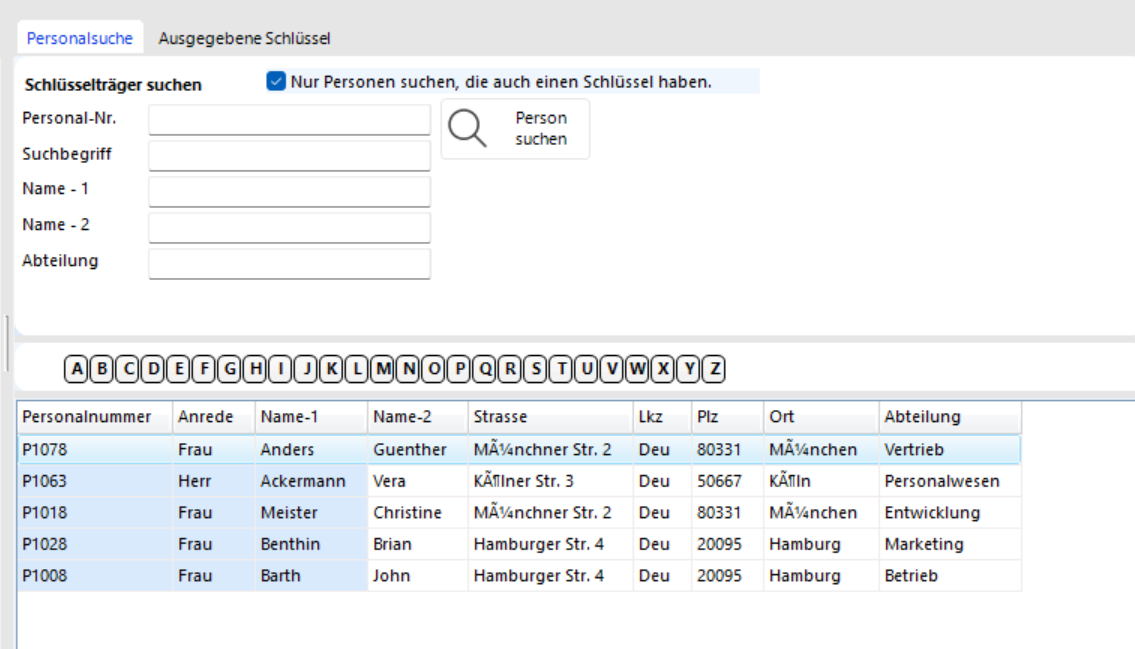
Find the key holder in the list and drag them to the right onto the RETURN button with the left mouse button held down (drag and drop). The KEY MOVEMENTS window opens.
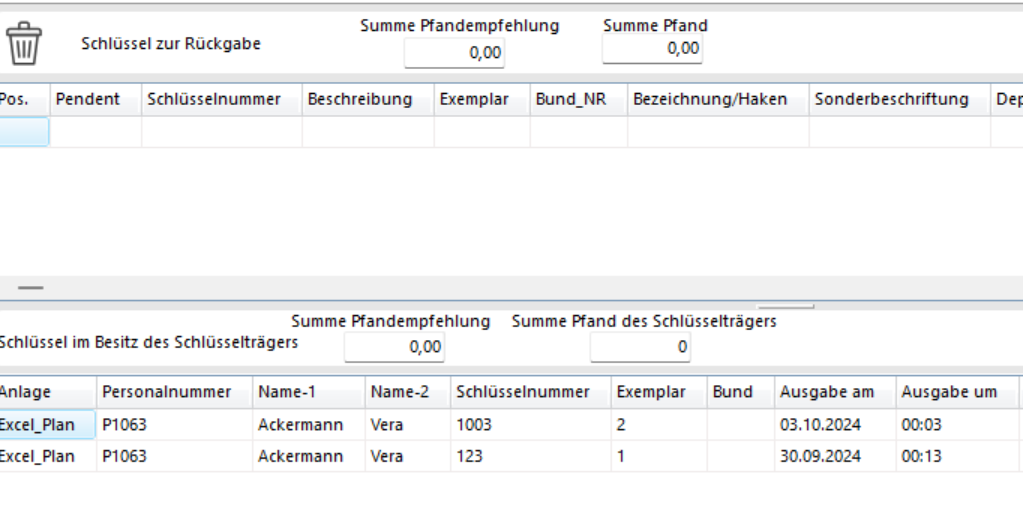
The key holder's details are already filled in.
The lower part of the window shows which keys the holder currently has.
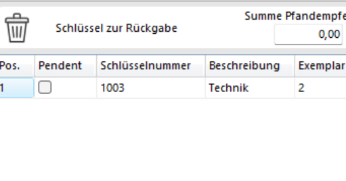
Double-click the key being returned. It is entered in the middle part of the window as KEYS FOR RETURN.

If the holder has several keys and you selected the wrong one for return, click DELETE POSITION (the bin icon) to remove it from the return list.

Post the key return by clicking BOOK.

Click KEY LOSS in the toolbar or press F7.
The KEY MOVEMENTS - LOSS window opens.
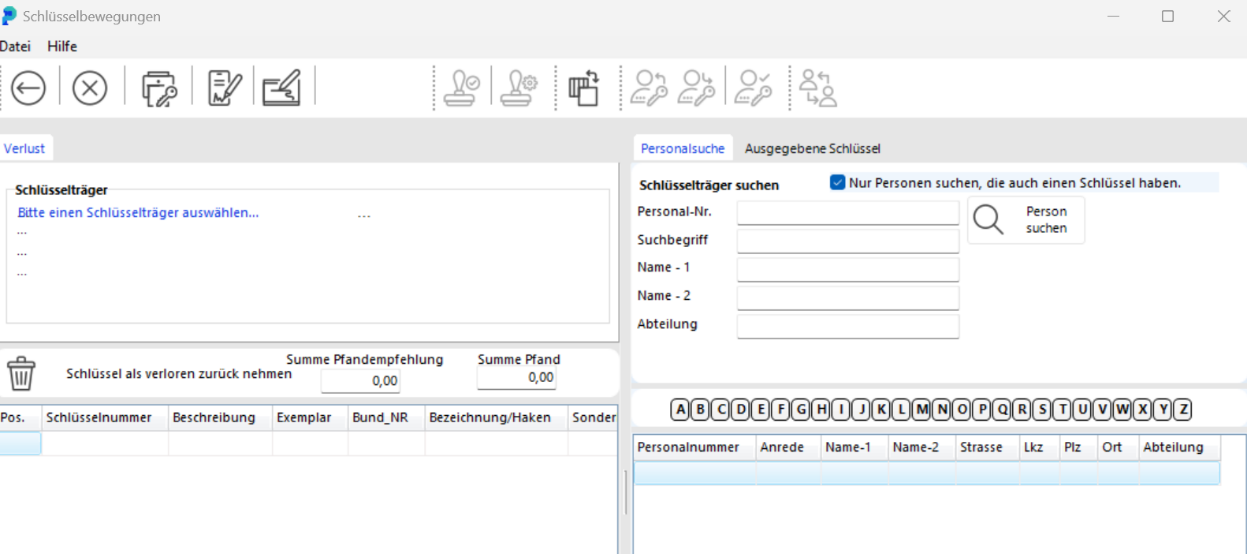
Enter the first letters of the key holder's surname in the NAME - 1 field. Click SEARCH PERSON to display the list of matches.
Alternatively, search for the lost key by key number. Click the ISSUED KEYS tab and enter the key number. Click SEARCH KEY to show every key holder who has a copy of that key.
Double-click the key holder you want in the lower part of the window. The holder's details are transferred.

All keys in the holder's possession are now listed in the lower part of the window.
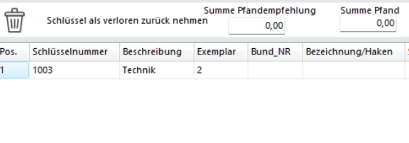
Double-click the lost key. It moves into the RETURN KEYS AS LOST list.

If the holder has several keys and you marked the wrong one as lost, click DELETE POSITION to remove it from the loss list.
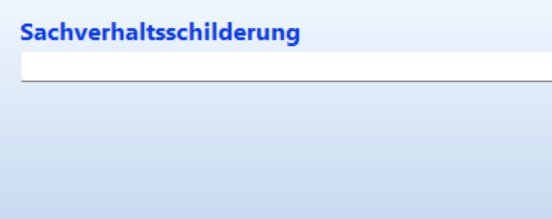
In the DESCRIPTION OF CIRCUMSTANCES field you can record what the key holder says about the loss. This entry is printed on the form but is not stored.

Post the loss report by clicking BOOK.

Click KEY DEFECT in the toolbar or press F8.
The KEY MOVEMENTS window opens.
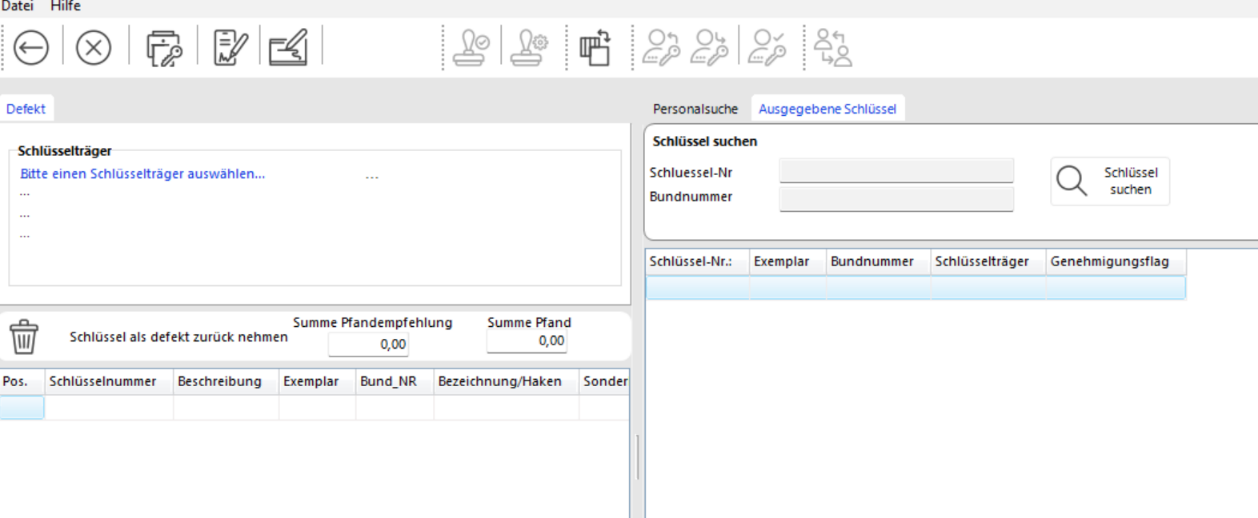
Follow the same steps as for a key loss. The key is posted with the status Defective.

In the MANAGEMENT / PERSONNEL module, click ADD RECORD in the toolbar.
The PERSONNEL window opens.
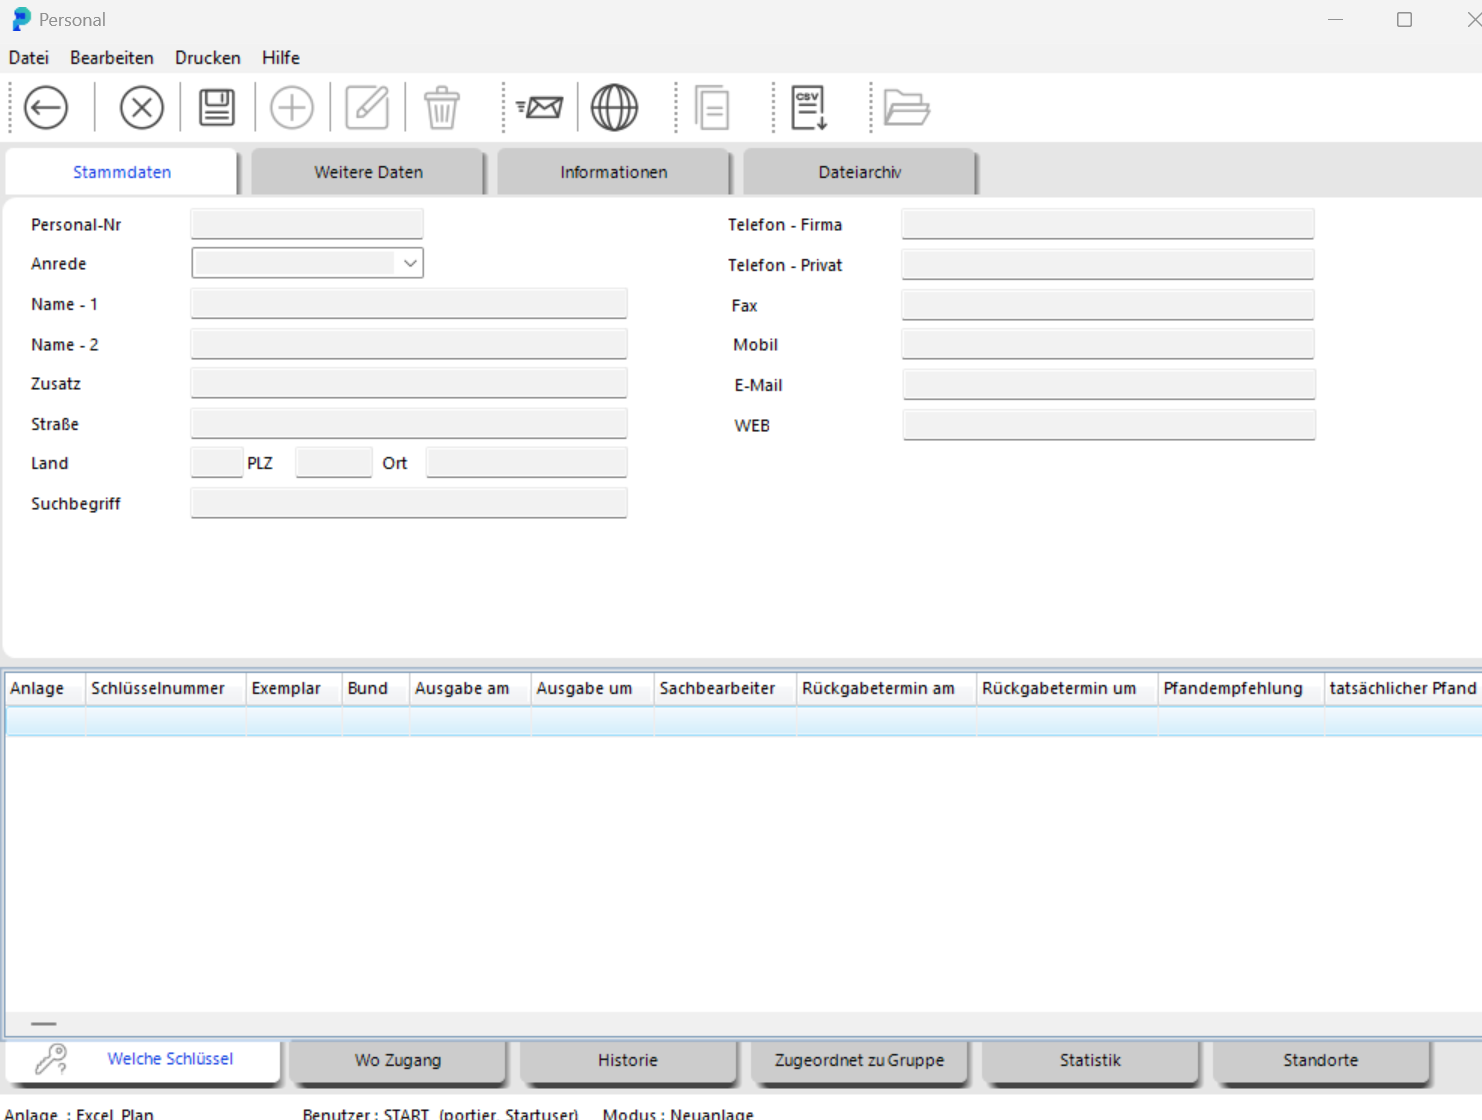
Enter the key holder's surname in the NAME - 1 field. The NAME - 2 field is for the first name.
We strongly recommend staying with the field assignment you choose at the start.

Save the data by clicking SAVE. You can complete the key holder's details later at any time.

Close the PERSONNEL window by clicking BACK. The person is now available as a key holder.
During key issue you get another chance to create a key holder. The ADD PERSON button opens the same screen described here.
In portier Vision each cylinder has its own record.

In the MANAGEMENT / CYLINDERS module, click ADD RECORD in the toolbar.
The CYLINDER window opens.
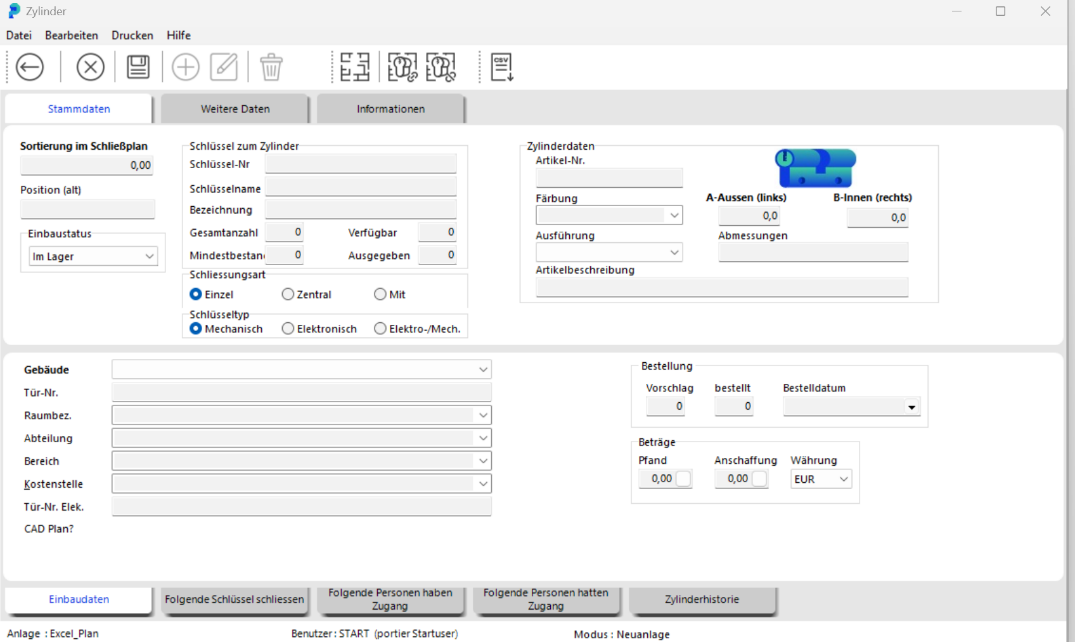
In the upper "KEYS FOR CYLINDER" section, enter the cylinder data. In the Installation Data section, state exactly where the cylinder has been fitted.

Save the data by clicking SAVE.

Close the CYLINDER window by clicking BACK.
The cylinder is now available. For the keys belonging to the cylinder, portier creates its own record in the Keys area and provides exactly the number of copies you entered under Total Count. Cylinder and key are linked by the key number, often called the locking number.
CAUTION: this key number can never be changed.
In the MANAGEMENT / CYLINDERS module, enter the data of the cylinder you are looking for in the CYLINDERS tab, for example the key number, and press ENTER. The cylinder is displayed.
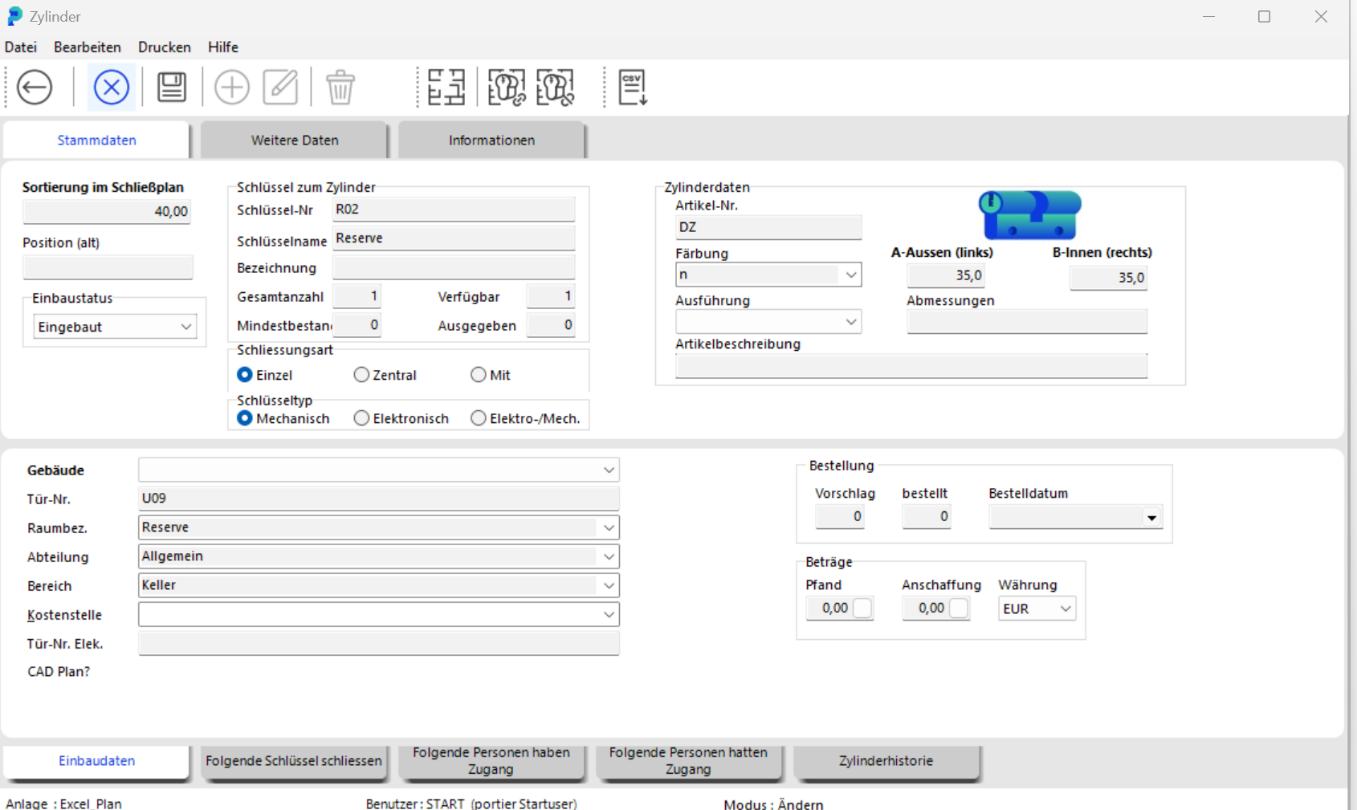
Double-click the cylinder to open the CYLINDER window.
In that window you will find the Installation Data tab. Edit the cylinder data there.

Save the changed cylinder data by clicking SAVE.
CAUTION: key details cannot be changed in the cylinder screen after the first entry. For changes, open the corresponding key screen in the MANAGEMENT / KEYS module. Edit the key details there. You need the corresponding rights.